I’ve been working on the doors, off and on, for forever.
Back in 2012, when we’d moved to the green house and I didn’t have a place to putter, I put up a bench in the barn and spent half my summer there, sanding down 2×6’s we’d saved from the Chicken Wing of the old barn. We had a big, wet pile of them, and the idea was to use them in the new house. Mostly, I wanted to use these 2x’s to make doors. Sounds simple, right? Like a silver bullet, maybe? Or gutters? 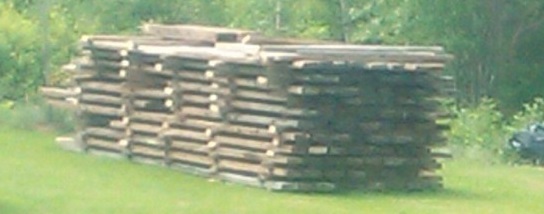
At the time, I was thinking quick and dirty. What’s the easiest way to make a plank door? My plan was to drill each plank sideways with 3 holes, and fish 1/2″ threaded rods through them, cinching the doors flat. Now that I think back on it, that idea doesn’t even sound good on paper, but it seemed reasonable at the time, and when I made a prototype, it came out really nice. Never mind that doors built that way will sag and will be free to twist, or that there’ll be light between the cracks, or that it won’t handle expansion well. These are just details, and I was on a mission, so I sanded down as many as I needed and drilled 3 holes in the edge of each plank. Which explains why, in their final form, so many of the doors have 3 holes drilled in each edge.
I gave them to Phoenix for finishing and when they finally came back, I was way too busy with Other Stuff to switch gears and put the doors together, so we stacked and stickered the boards in a pile in the basement and I chipped away at the Other pile.
But really, I’d put the cart before the horse: Before I needed doors, I needed door jambs.
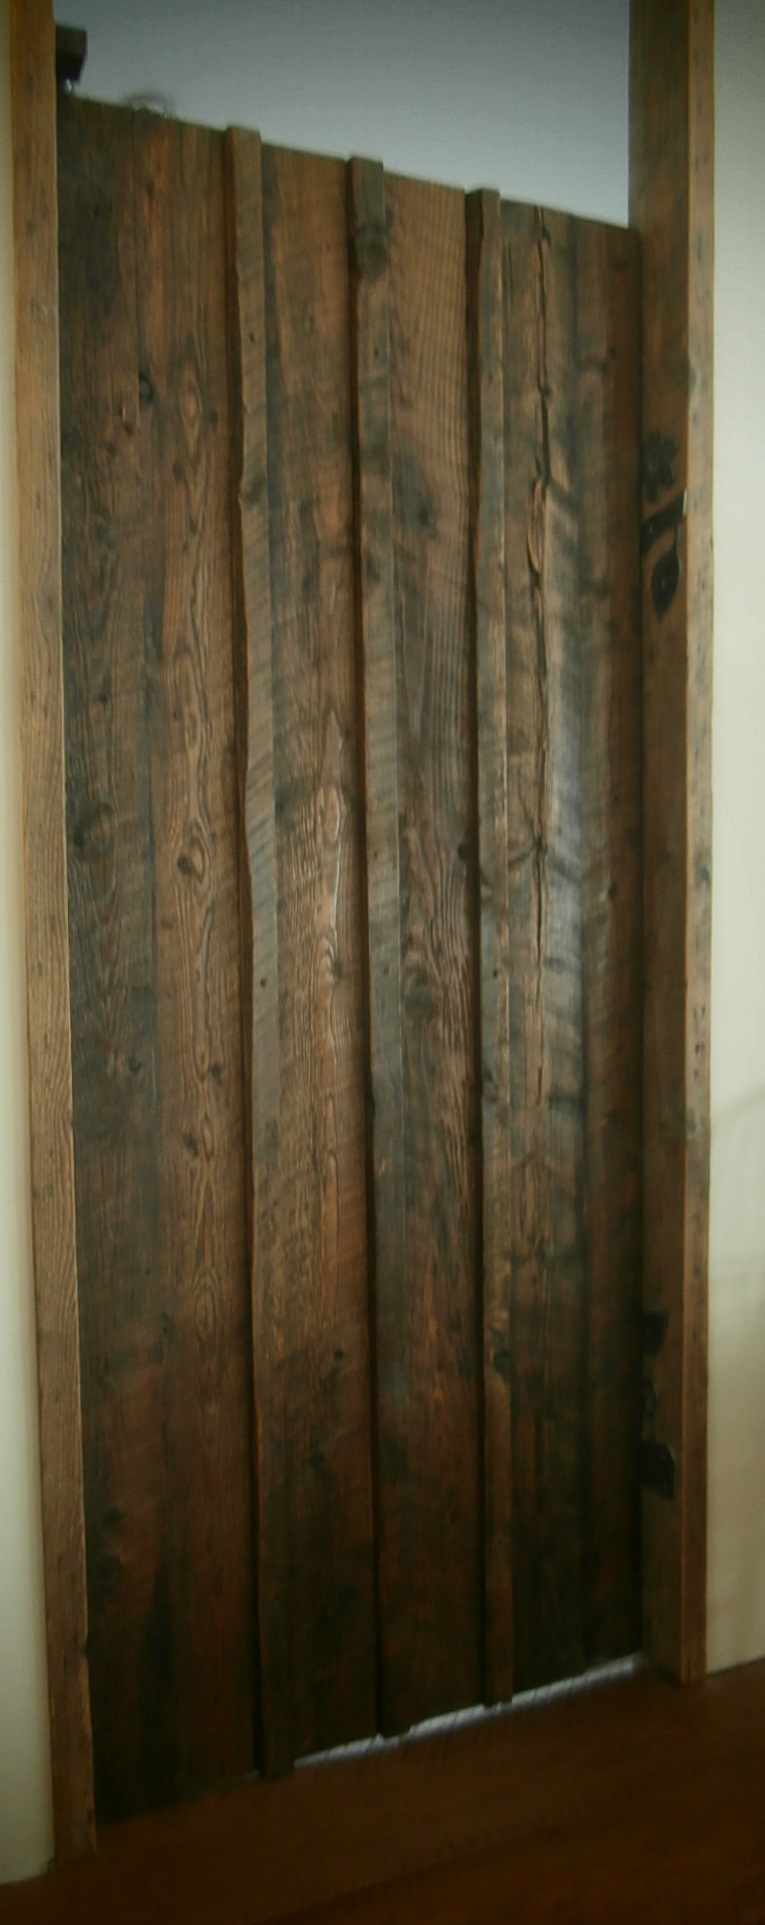
Since there were a couple dozen really nice 9-foot planks in the pile, I decided the design should make a Statement by running the jambs all the way to the ceiling, which puts a transom over each door. And because I wanted a certain ‘look,’ I plastered right up to the jambs, and there’s no trim. This was a lot of work! Mind you now, these are 2×6’s that are 2″ x 6″ and they’d been rough cut, exposed to farm animals, and then buried in the mud for several years before I pulled them out and stacked them up. They’ve got live edges, old nails, insect borings, and color and texture out the wazoo. All this was a long time ago, so I won’t make a long story of it, but I’m telling you, the door jambs alone are a work of art.
So I want the doors to look nice.
Meanwhile, the 56 sanded and sealed planks for them sat in a pile in a corner of the basement, drying out, and when I was ready to make the doors, they were not only nice and dry, but also twisted and warped. The holes in the edges no longer lined up, and the threaded rod method was not going to work. Which is probably a good thing. Not only that, but the boards had shrunk, and instead of needing six planks for a 3-foot door, I was going to need 7. Or fewer doors.
I decided I’d spline the planks together, which gives a nice rigid structure and blocks all the light between the planks. This was back before we moved in, and there wasn’t time to do all the doors, but we decided that the one door we absolutely had to have was at the top of the stairs to the shop. So I planned to build that door as a pipe-cleaner, to see if the splining method was going to work. I argued with myself: I’d made a threaded-rod prototype and, in the end, It hadn’t helped, so why bother with a prototype at all? Why not just make the whole pile of doors?
Because, I decided, even I am not that stupid.
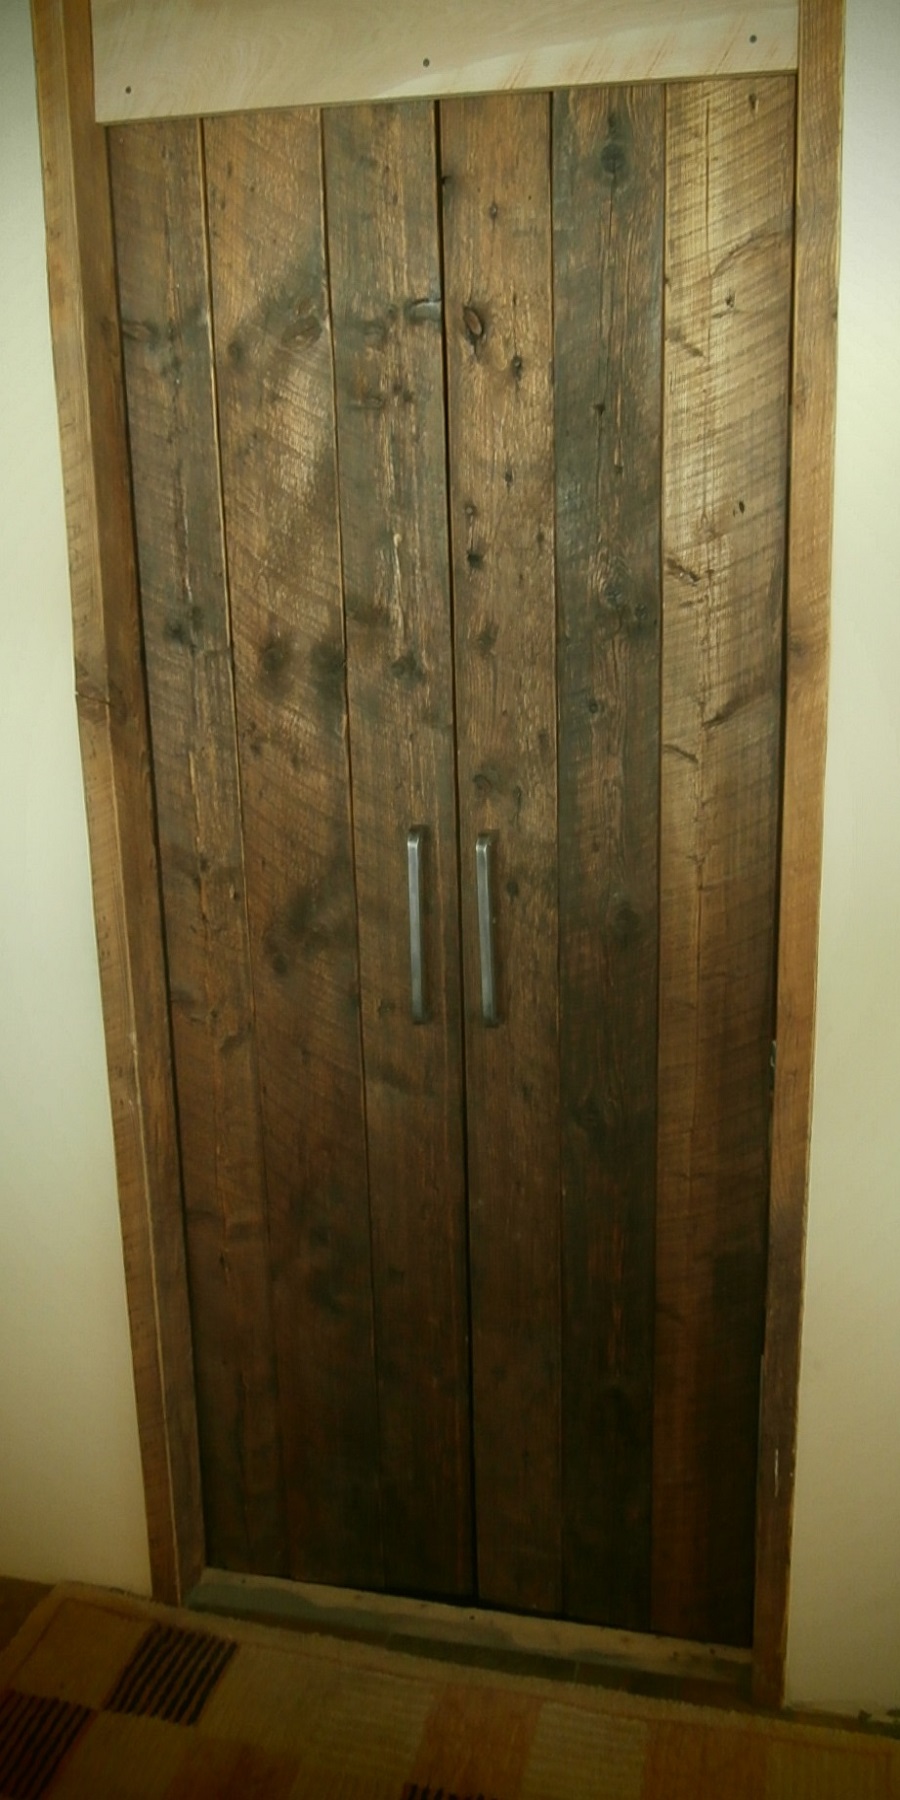 I thought it through in my mind: Clearly, this door should swing Out, towards the front door. But do I want the hinges on the left or on the right? Hmmm. I wanted to get this right, because I am always carrying heavy, bulky stuff up and down the stairs. Just as I was about to get it wrong, inspiration struck, and I decided to put hinges on both sides, and use 2 half-width doors, swinging In, over the stairs. Believe me: it works. So I splined together 2 narrow doors out of 3 planks apiece. The process worked, and they came out perfect.
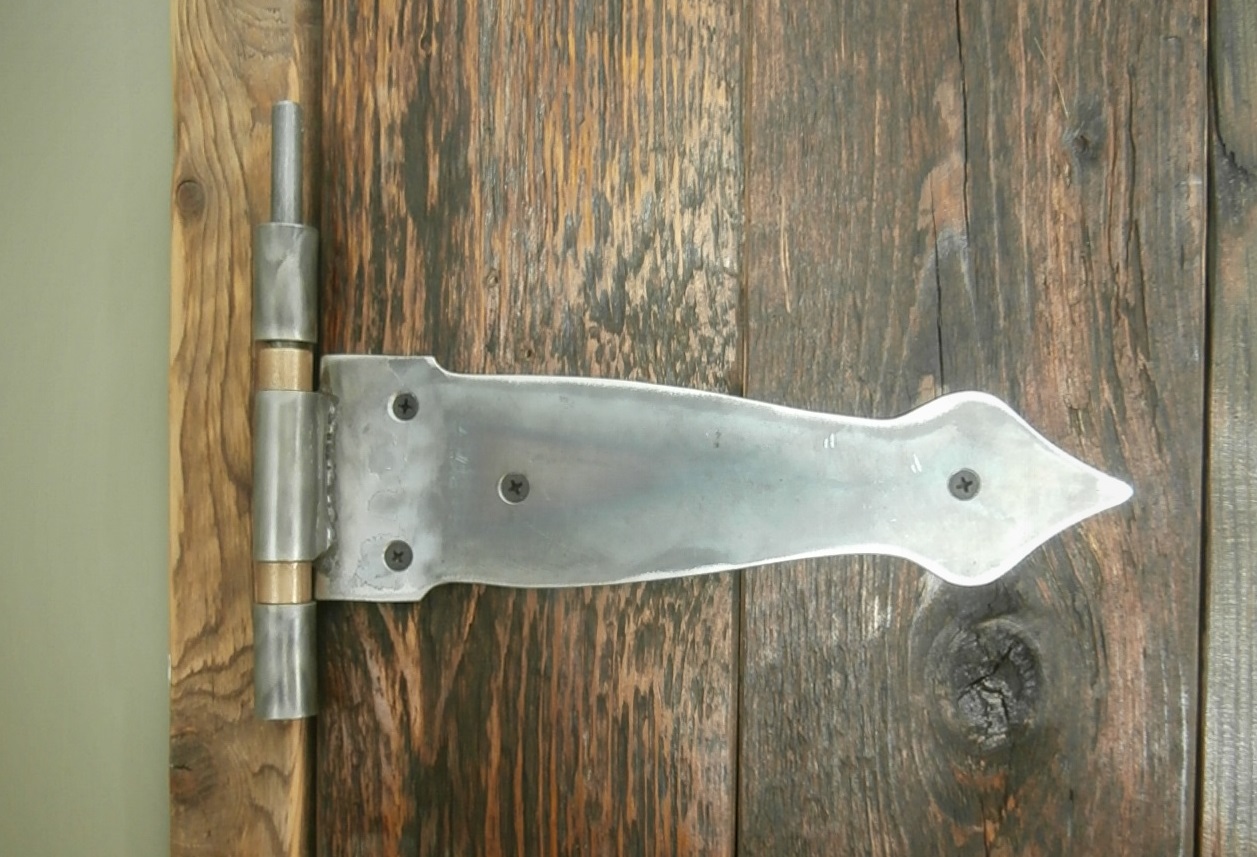
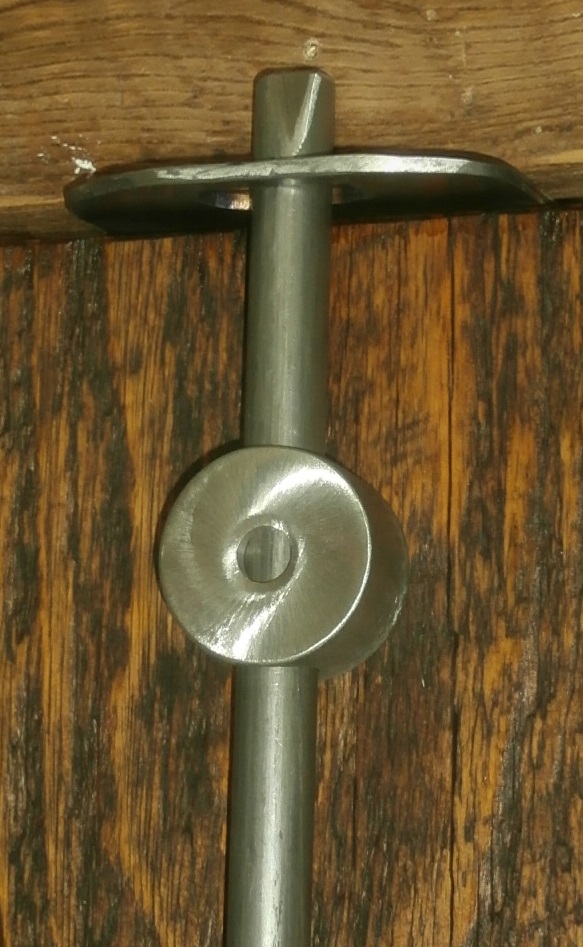
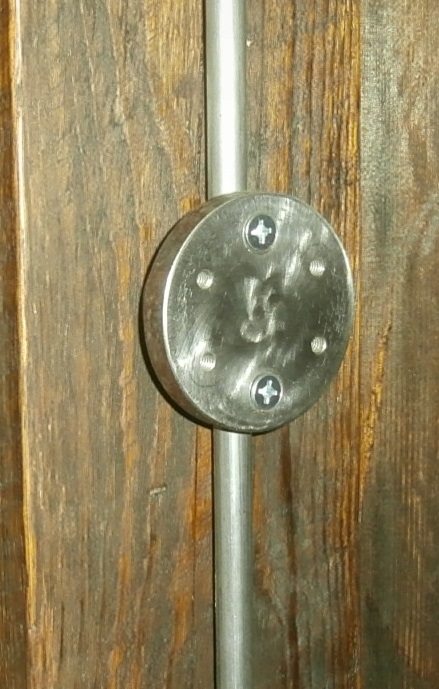
To mount them, if I used regular hinges, my 36″ opening was going to leave me with a 32″ passage. But if I could find a hinge that works ‘like so,’ I’d still have a full 36″ passage for hauling junk through the doorway. 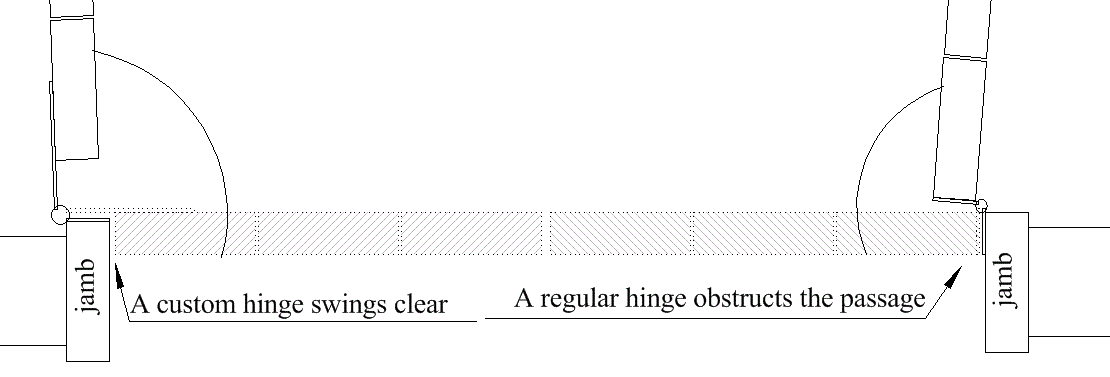 Well you can’t find a hinge that works like that, so I decided to make my own. I wouldn’t say they’re pretty, but they’re pretty cool. And they work perfectly.
  Other Stuff reared its ugly head again and, for months, we lived with just this one door in the house. It was never a problem except occasionally in the bathroom, and we learned to – um – sense when someone was in there.
I used the last stretch of bad weather before summer ’13 kicked in to assemble the rest of the doors. To get the widths right, I ripped some boards in half and turned them on edge to give me a 2″ width increment without making it look like I’d ripped one of the boards down. One live edge stands proud on the door face, and all the doors’ cross sections look different. I set up enormous routing jigs on the shop bench and routed the spline grooves so they aligned even when the boards themselves did not. 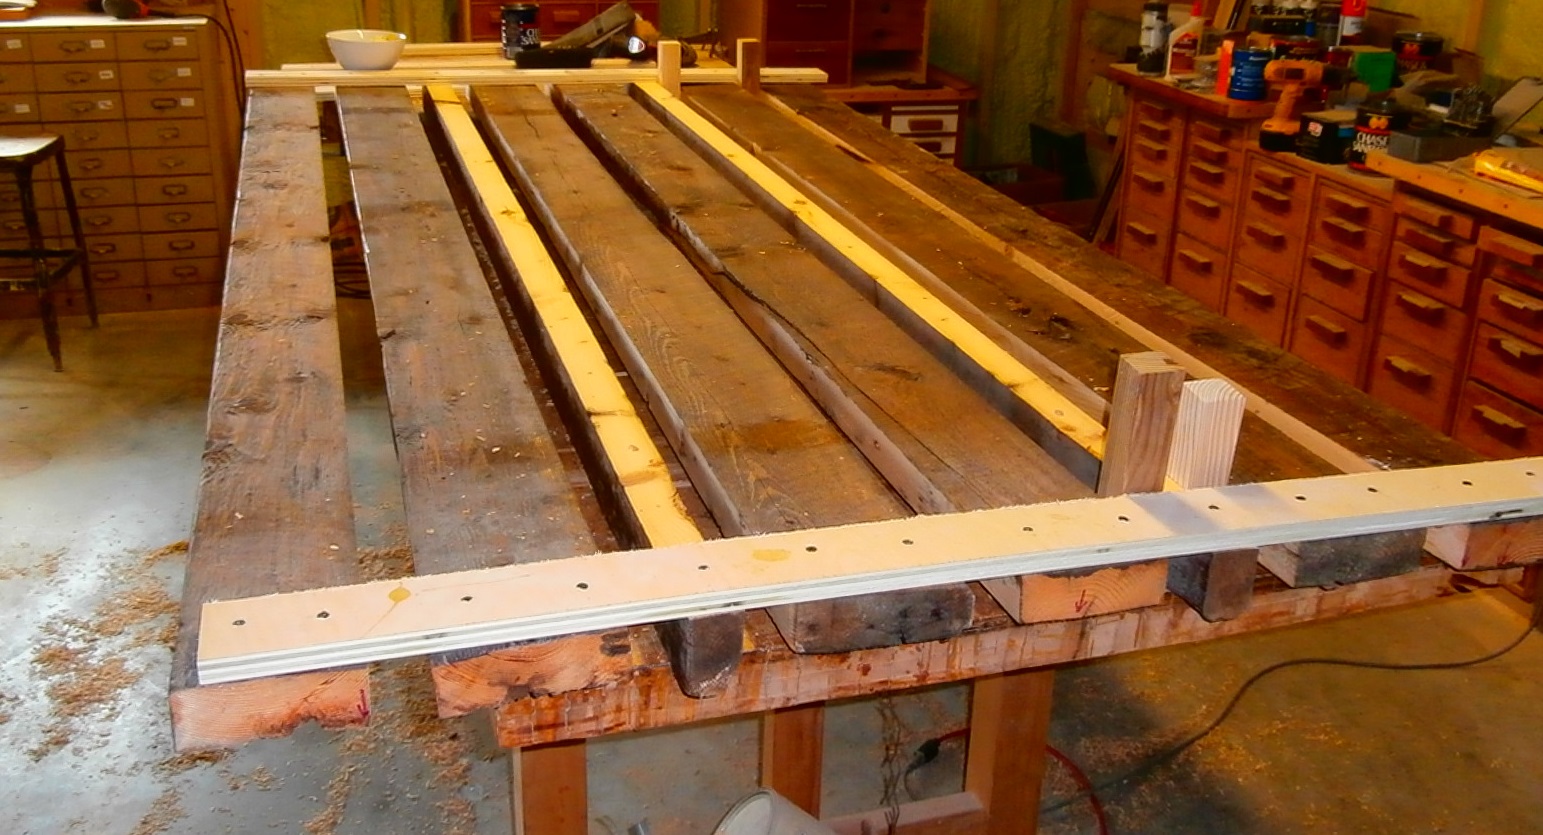
I glued them all up, put them in a pile ‘out of the way’ in another corner of the basement, and did Other Stuff all summer. Come the fall, I started thinking about indoor projects again, and the doors were high on my list, so …
Jambs: Check.
Doors: Check.
Hinges: Um …
The doors and the jambs are gorgeous, and I really -Really!- didn’t want to be making big ugly holes in them for hinges and knobs. So I decided I’d try to mount the hinges on Top of the wood instead of mortising them into it. The wood is already full of nail and critter holes, so nobody is going to notice a stray screw hole if I decide to change the hardware some day. But surface-mounted hinges are ugly, and when they’re not, they cost an arm and a leg. So I thought to myself: my stairwell hinges work great, so if I could just make them look as good as they work…
Meanwhile…
Dad’s timing has always been “a little off,” and he sent me my Christmas present in November. (And his holiday newsletter in October, as I recall.) One of the boxes was his 20-year old Henrob-2000 acetylene torch set, and I set it aside thinking that if a metal cutting project ever came up, I was all set. Well I had some 1/8″ steel plate left over from the gutters project, and I started by cutting off some pieces to practice on. My bandsaw leaves sharp pieces of swarf behind, and …. Ouch! That’s not what I meant by cutting! 
Cutting with a torch is a lot like welding, and takes plenty of practice.
The wisdom of welding is “watch the puddle.” (And it’s really true.)
For cutting, they tell you to “watch the oxygen tip,” but they don’t tell you what to watch for. I made a mess of many pieces of metal before I figured it out. (Don’t ask.)
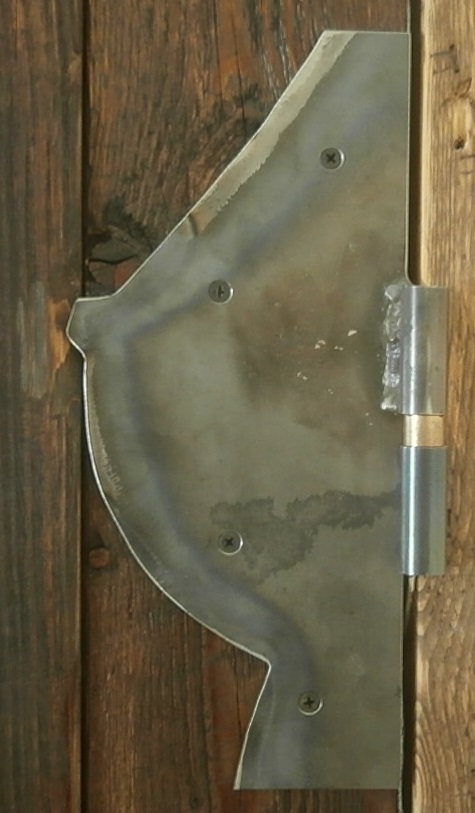
My first hinge was supposed to look like a saw blade and, for a prototype, it turned out OK. I wish I could say that all the shiny grinding marks were artistically added to evoke sharpness, but the truth is that I had to do that much grinding just to get rid of the gobs of slag. Still, it looks great on my office door. 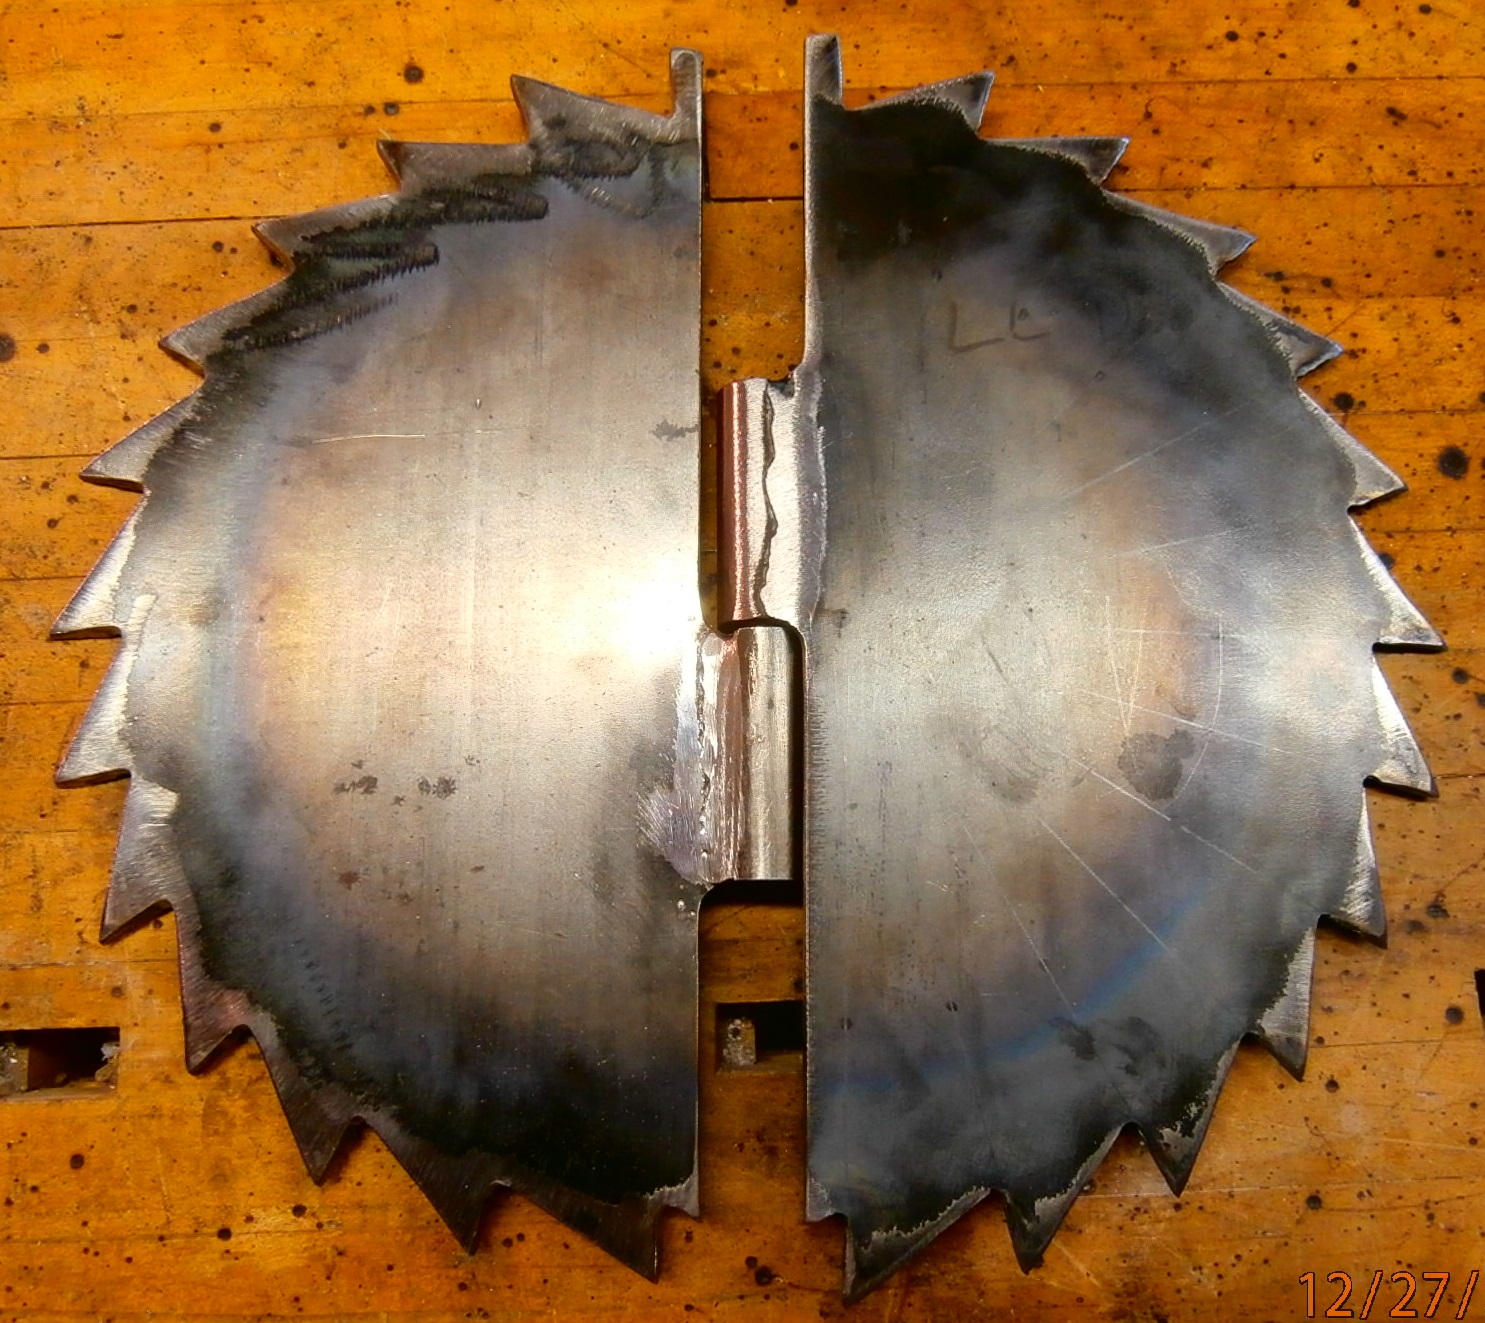
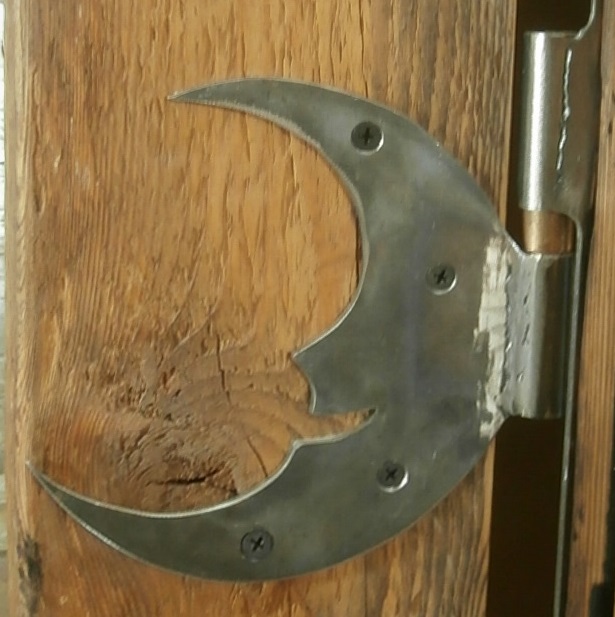
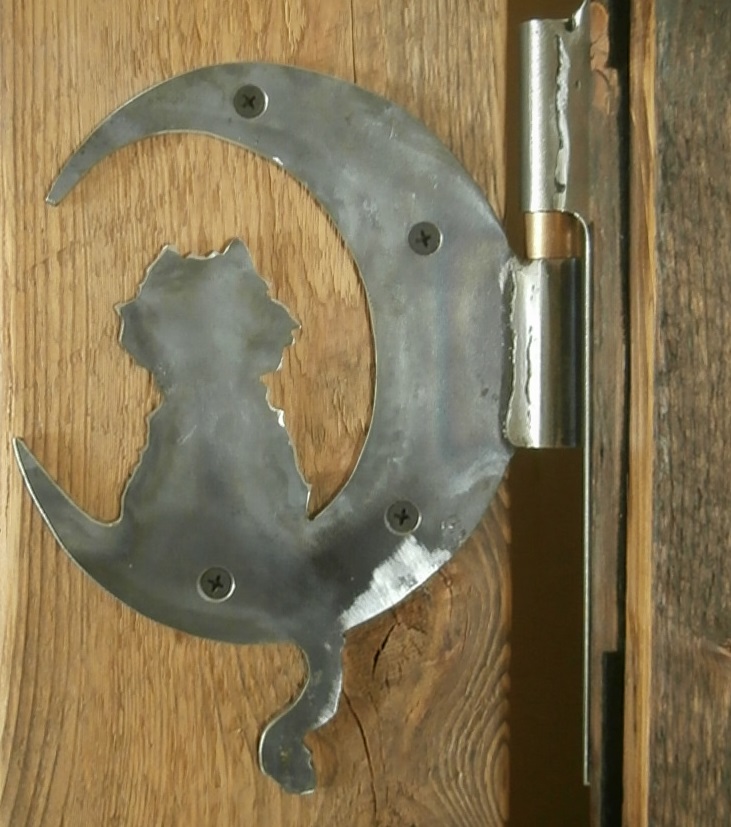
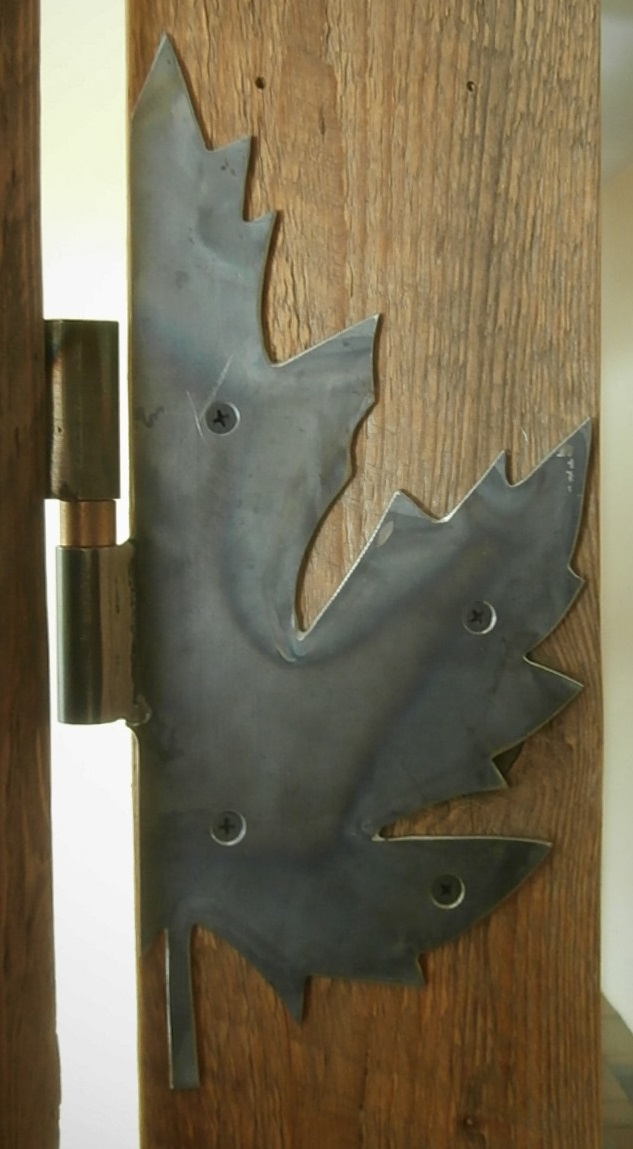
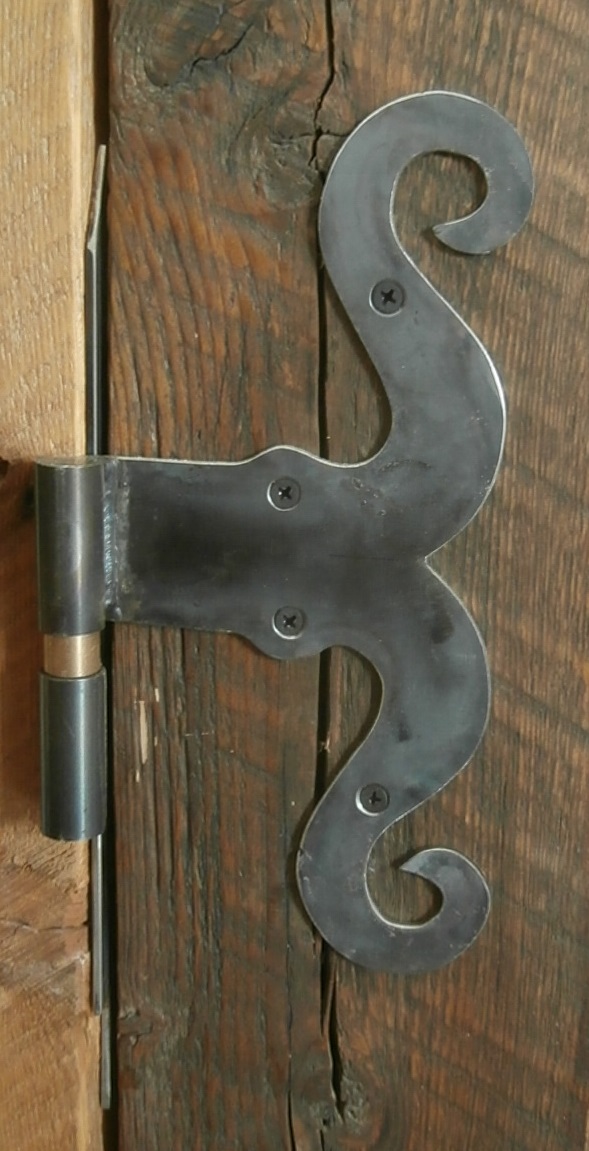
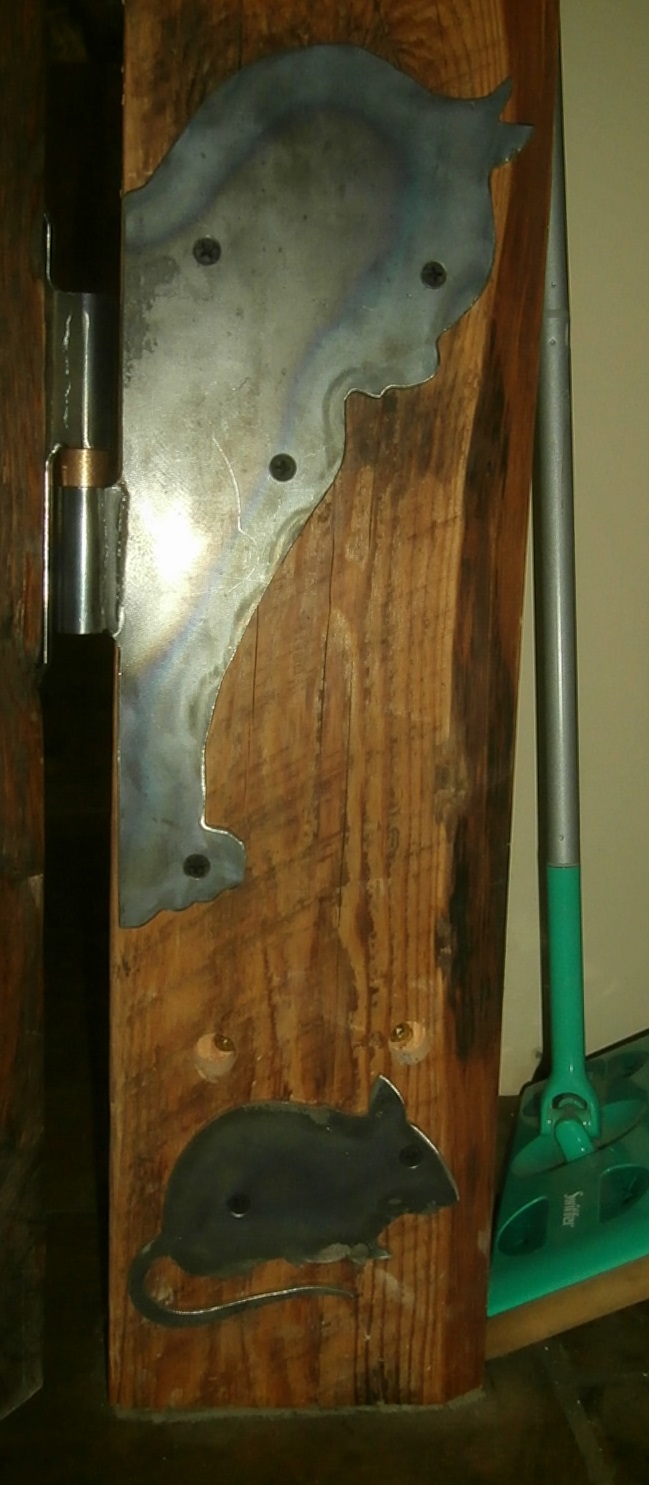
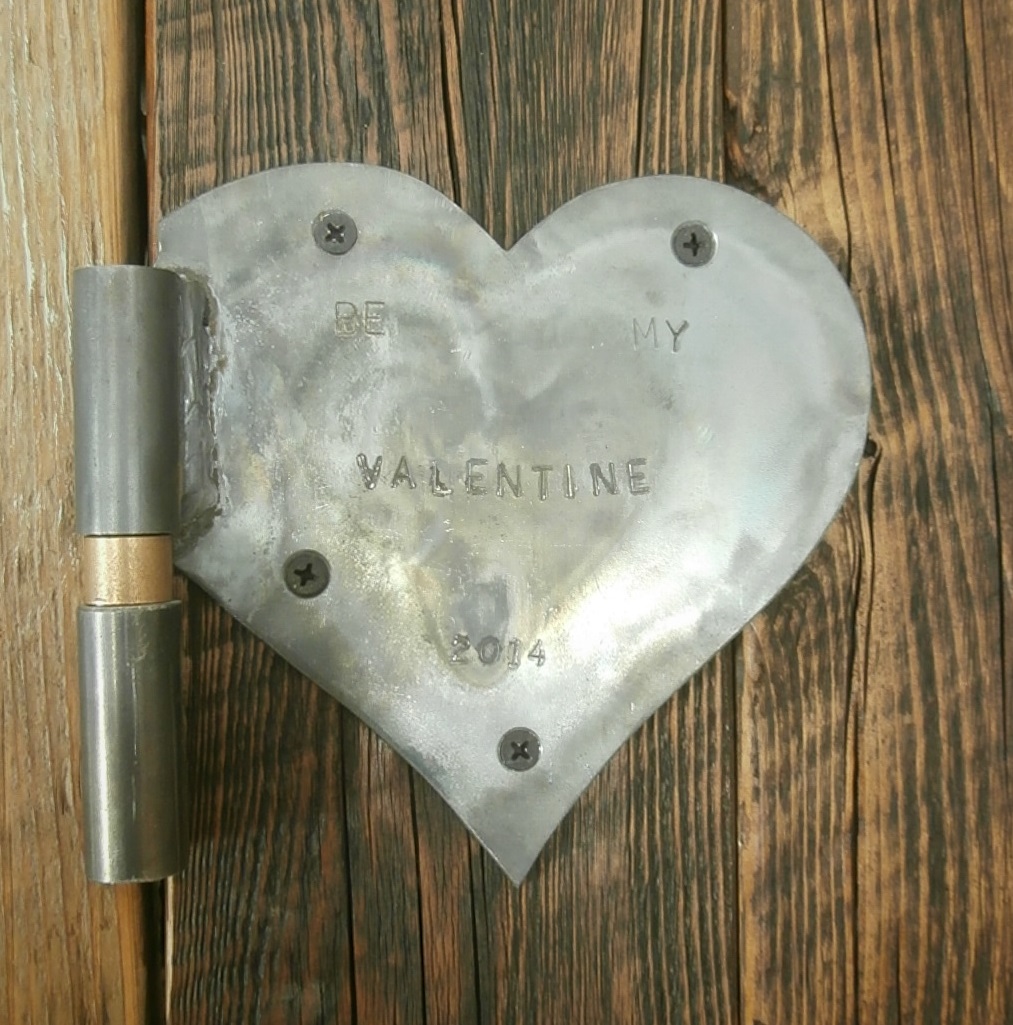
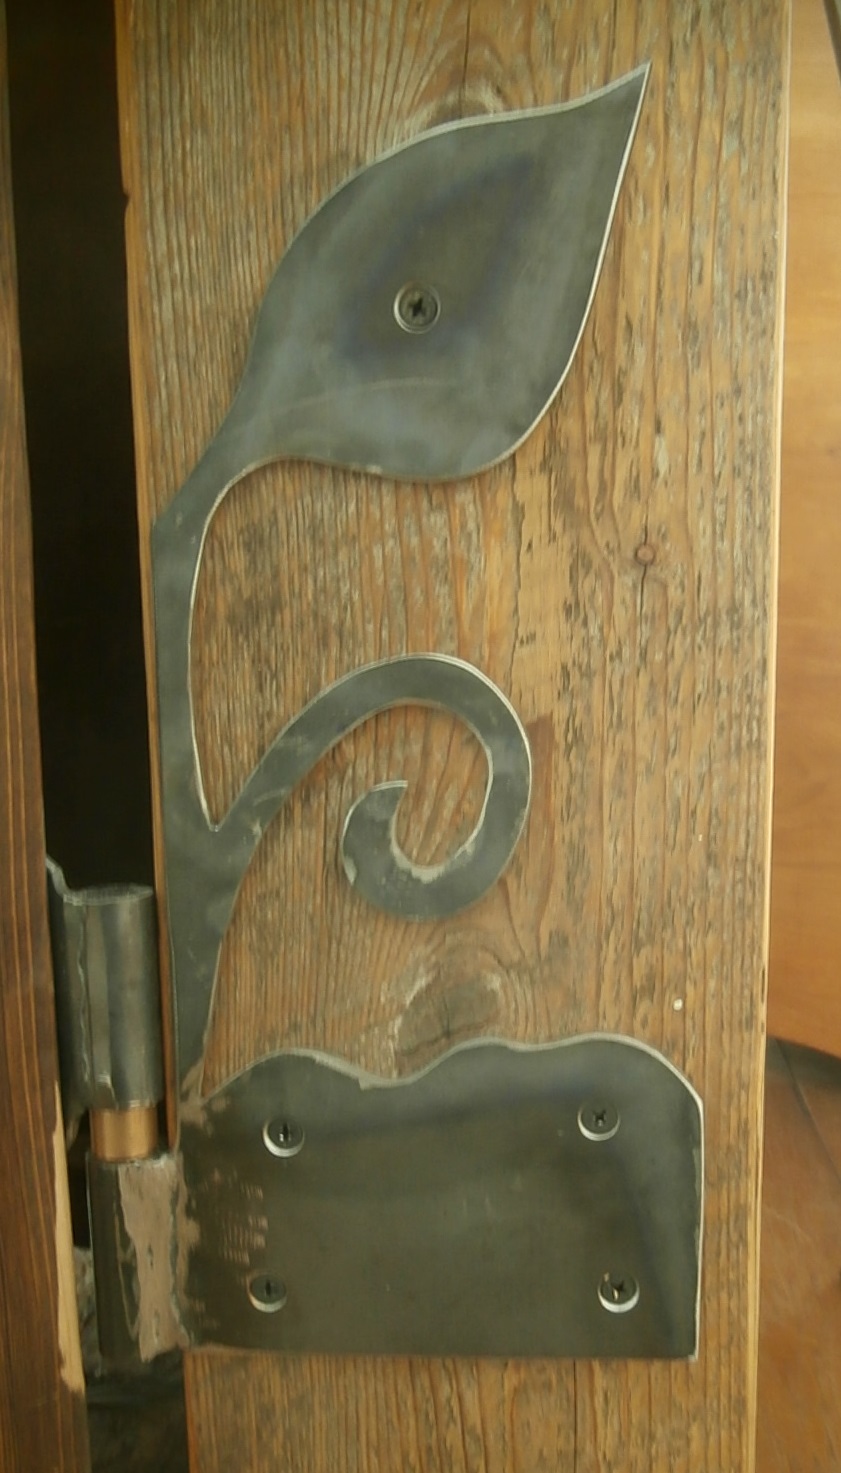
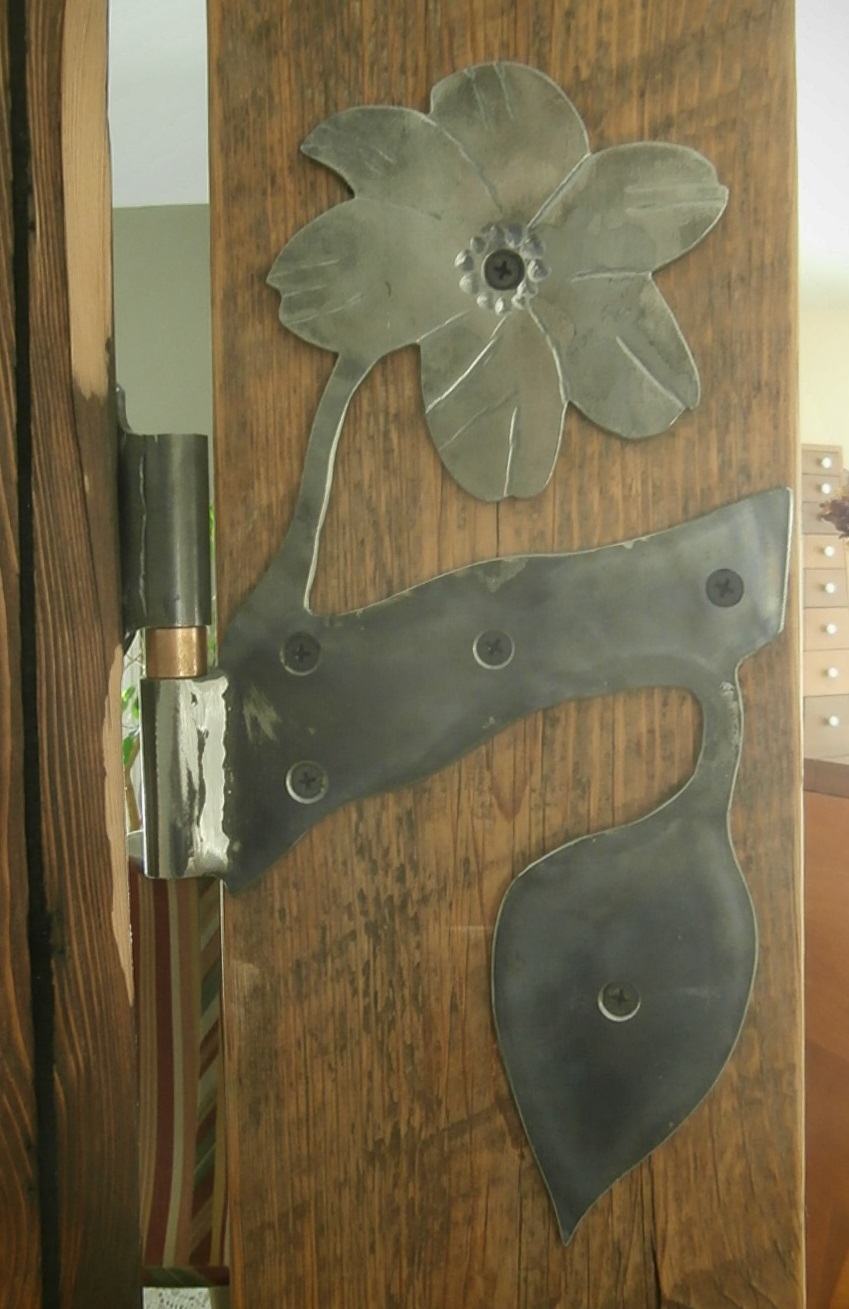
I won’t bore you with the details, but here is a gallery of some of the other hinges we’re using. (You can click most of them for bigger images.)
It wouldn’t be a bathroom without a crescent moon.
Also in the bathroom: 2 big tits!

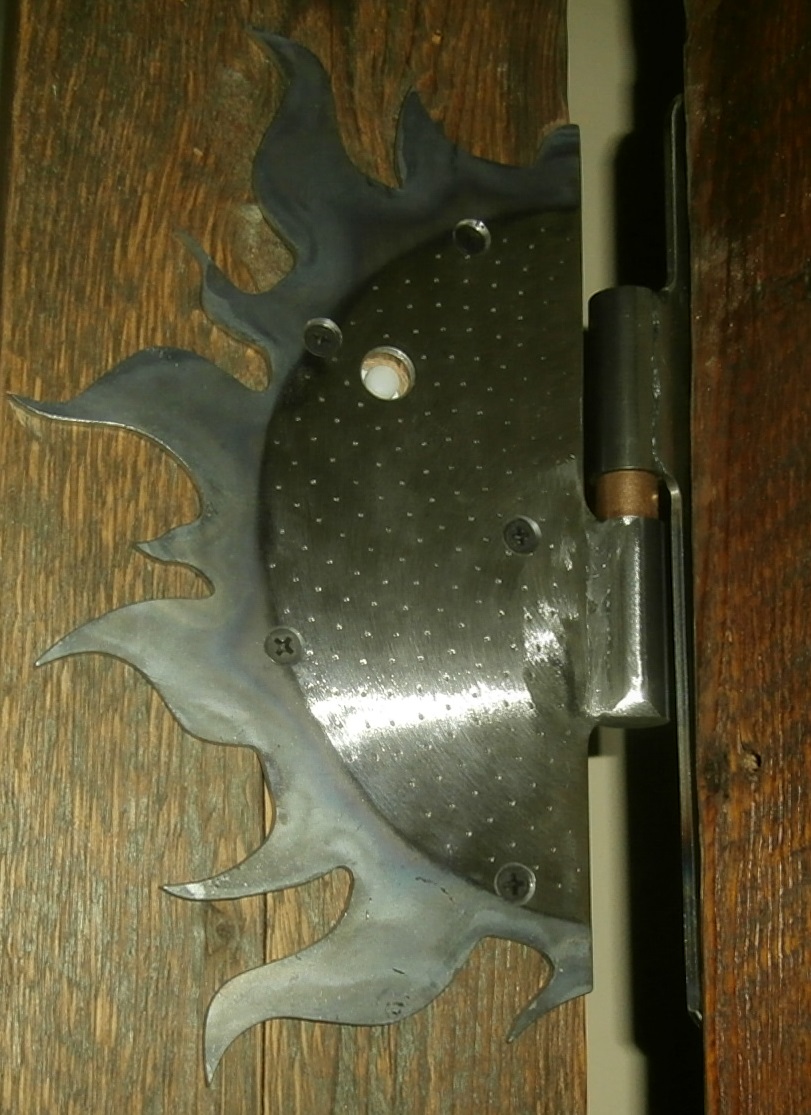
In the hall closet: The sun and sunflowers.

The corner office:
In the other hall closet:


In the Master bedroom:
In the Master bathroom:

Hinges: Check.
Now I could finally try to hang the doors. Some of them worked fine, but 3 of them just wouldn’t lie flat. If you go back to the picture of the “enormous routing jig” above, you’ll see that I’ve got 2 screws in each end of each plank, so each twisted board is being un-twisted by just a little bit in the jig. Combined, the assembled door is out-of-plane by 2-3″, and they look like hell against the nice plumb jambs. Damn.
I bit the bullet and cut the crooked doors apart, and re-assembled them so the twists add up to net-zero. This end view of one of the doors may look like a haphazard bunch of barn boards, but it’s really a precision-milled assembly, and the planarity came out good.  It was the project that wouldn’t end. I had jambs, doors, and hinges, and I was getting tired of the whole affair, but if the doors won’t stay closed, or if there’s nothing to grab to close them in the first place, then you might as well not have doors at all. So I still needed handles and latches, and I was still dead set against mortising into the wood.
Futhermore, I was informed, the color scheme of the whole schmear had to be consistent and pleasing. Yes dear.
In my office, the doorway is 60″ wide, and the door covers half of it and it’s locked in place most of the time. Using cold-rolled steel, I cobbled together a latch which is attractive, slightly industrial, and a little over-the top. I had a wooden handle on the pivot, but it clashed with the color scheme and is gone.

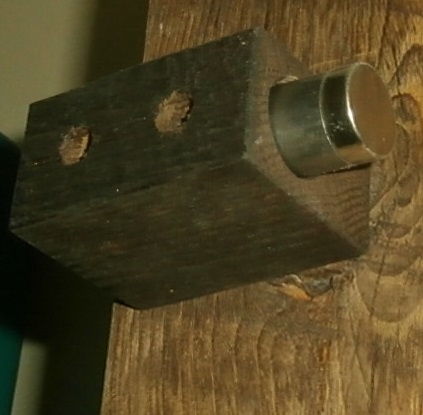
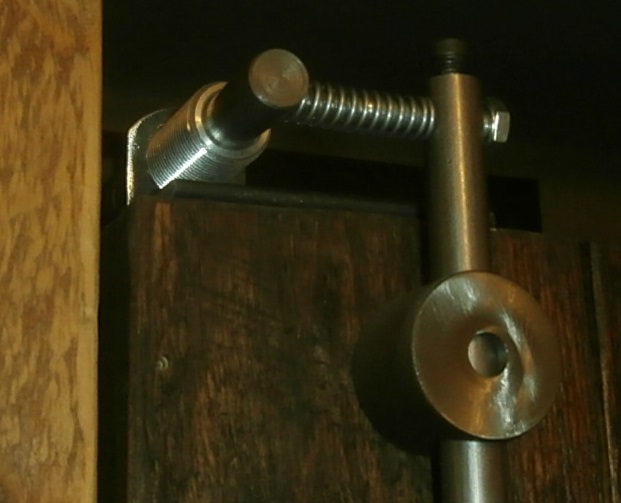
All the doors are heavy, solid-wood affairs, and when they hit a ‘stop,’ there is a big noise, a small earthquake, and a rebound. Any door that’s going to get used is going to need some kind of shock absorber. I bought a selection of springs and rare-earth magnets and experimented until I had a compact, jamb-mounted doorstop that caught and retained the door with neither a thud nor a bounce. 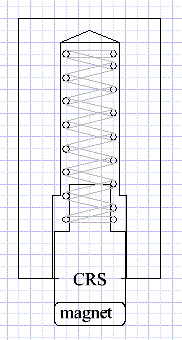
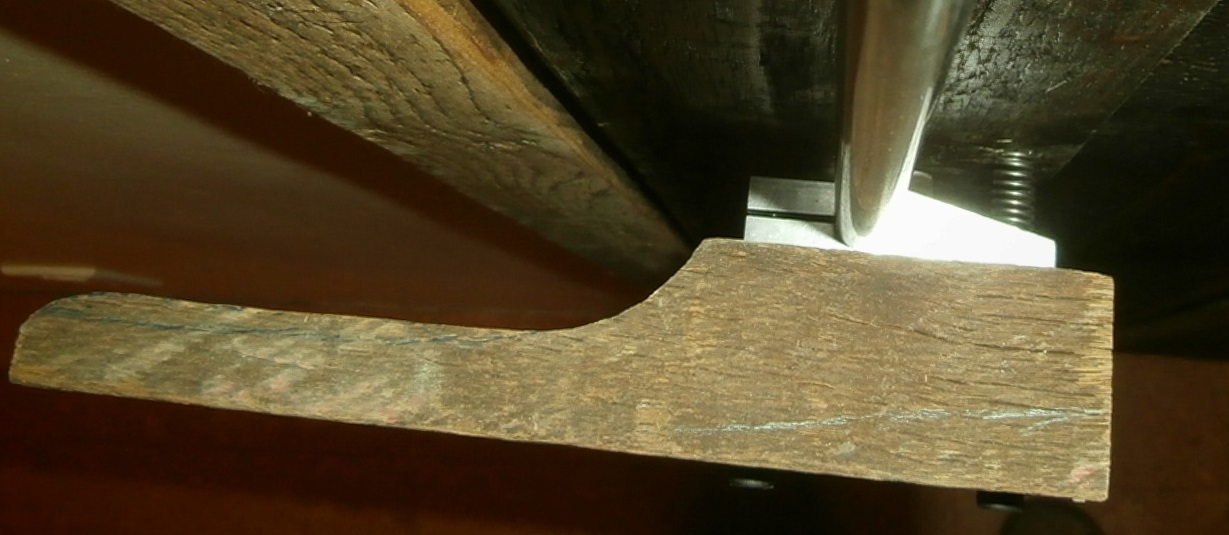
For bathroom and bedroom doors where you “shut yourself in,” I needed something with the full holding power of a rare-earth magnet from the outside, but a levered release from the inside. What I came up with doesn’t come across very well in the photos, and could use some tinkering, but it has the same visual theme as my office door and it gets the job done.
Finally, I needed a plain old handle, with no moving parts, to grab when I need to pull on a door. I was warming up to cold rolled steel by now, and I heat-bent some 1/2″ x 3/4″ stock and then tried to figure out if there was a way I could grind it into a pleasing profile. The shape of the bent section is living proof that, in an incompressible fluid, “Div ρv = 0″. I like that, and I decided to use these contours as the basis for the shape of the handle. 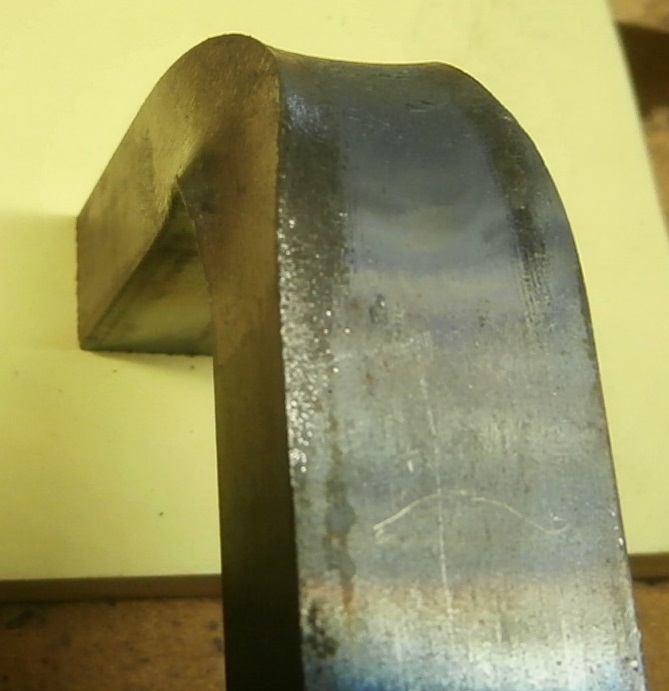
I’ve always thought my sharpening grinder should be turned sideways to reduce the wear on the abrasive wheel, and I used the door handles as an excuse to finally take it apart. I mounted the raw, bent handle on the slide that usually holds a dull blade, adjusted the angles to match the curve of the bulge, and “sharpened it” for about 20 minutes per side.  It gave me a tapered profile that looks and feels like it belongs on the doors.
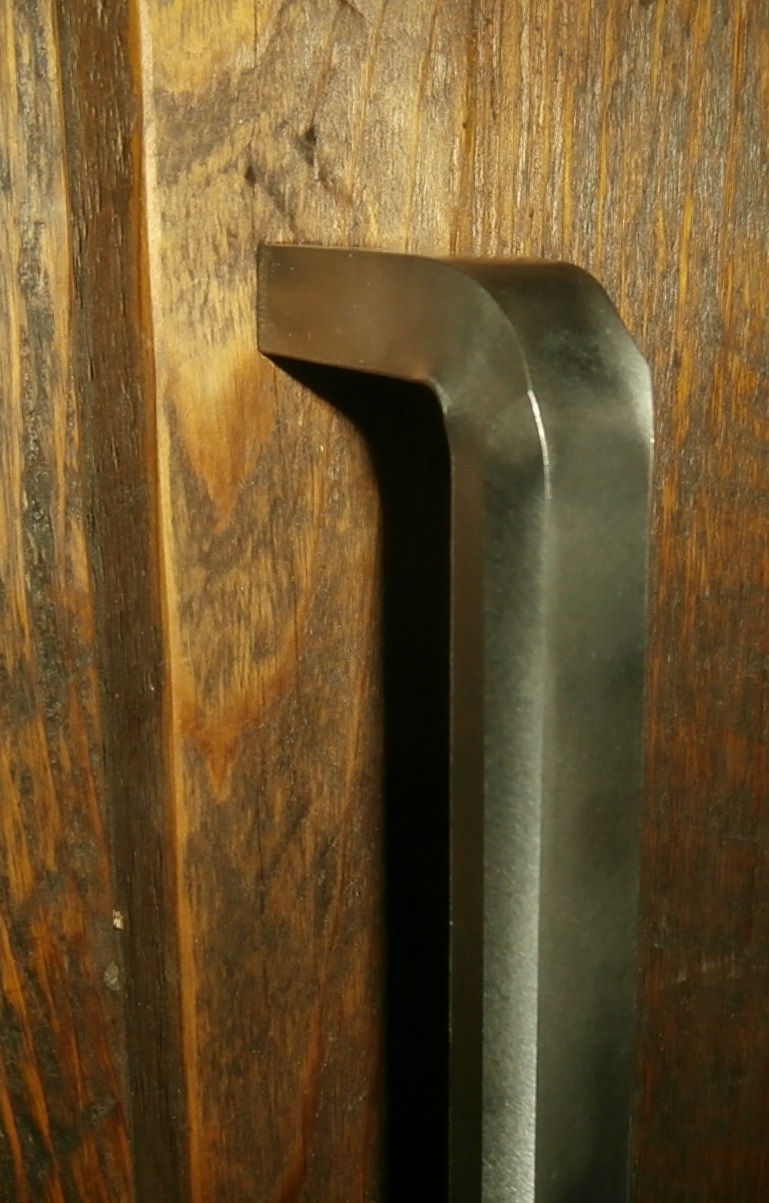
OK, so I got a little bit carried away. What did you expect?
Honestly, if I were to come across these designs in a store or a craft fair, I would probably not pay money to have them in my home, but I would make a mental snapshot, talk the guy up, and then put it on my list of things I ought to try my hand at.
Check.