Labor Day Gut Check

There was a time, about 6 months ago, when we lived in a dream world where we hoped to be living in the new place shortly after labor day. For that to work, we’d have needed to start mid-May, nothing could have gone wrong, no rain days, no days off, no changes in plans, and a whole slew of contractors would have to have been chomping at the bit. It would have put God’s “7 days” schtick to shame. 

Instead, we moved to Mville by 5/31, waited a mandatory 15 days for public comment, and got started on 6/13. Site work took about 6+ weeks, and there was a 2 week ‘pause’ before framing started. That puts us about a month behind a best-case schedule in which an Oct 1 move might have been possible.  

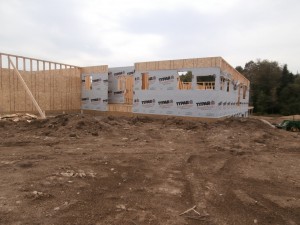
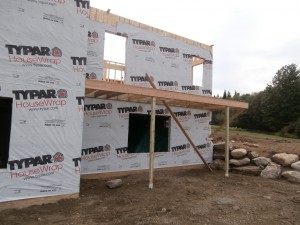
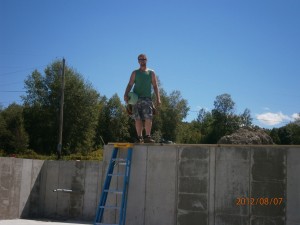
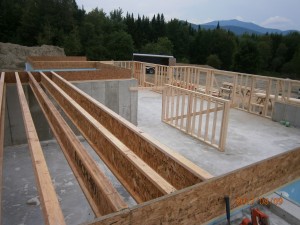
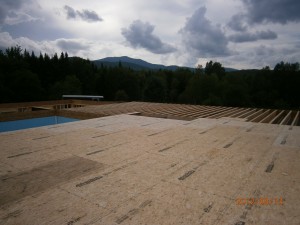
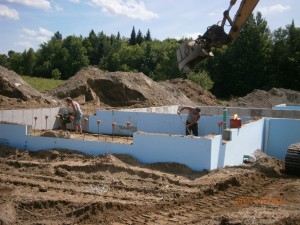
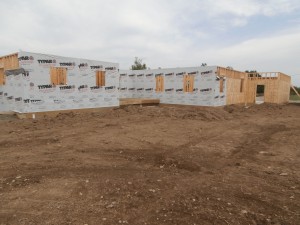
It’s Labor Day. Most of August was spent on framing, from basement walls to steel beam to floor system to subfloor to exterior walls to interior walls to a stairway and garage walls.  Since the roof trusses are not ready yet, the Crew is splitting their time with another job, and all the invisible details that make framing ‘done’ are getting done.  This is what the project looks like now:

View from back yard on Labor day


frontPorch


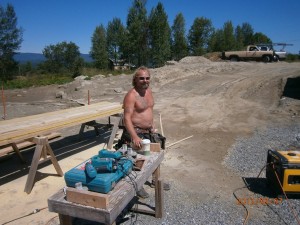
For the longest time, there was not much I could do to help, so I kept busy by prepping for woodwork to come, while staying out of Bernie’s hair. He came by one day and mentioned that he was going to be needing a spec for the electrician pretty soon, so I got to work on planning for that.  He’d said to expect something like $80/box, and when my grand total box count came to 307 boxes, I knew my days of sitting on the sidelines were over. Sure, Bernie had warned that taking on the electrical system would be intimidating and sure, the Nebraska Valley house he’d showed us looked pretty impressive, but come on: I’m a EE with 2o years of experience designing the most complicated memories on Earth. I’ve been pulling wires since 3rd grade, and I’ve wired many structures. I can do this.

And besides, a CAD model of box placements is no substitute for putting boxes exactly where you want them. So I headed to Yankee Electric and bought a bunch of blue boxes and a few rolls of wire and got started. Problem #1: I can’t wire walls that haven’t been framed yet, so I started off  by drilling holes in the joists for “busses” of wires from the panel to wherever the circuit  was located. In the past, I’ve always run wires by drilling lots of little holes, and crammed as many wires as possible through them. This is awkward and ugly, and this time around, I went the other extreme and loaded my big drill with a 2″ auger bit and planned some Manhattan routes. Most of the time, this is overkill, but on some runs, there are enough wires that I’m happy to have a huge hole.

That first day was brutal. It’s a heavy drill and, with a big bit in it, it bucks. The work was all overhead, and the holes were horizontal, so gravity was not helpful when the self-feed petered out on the last 1/16″ of every hole. The only way to apply pressure to finish the hole was to brace my forearms against the next joist over and lever the drill into the hole. And the whole time, big auger chips rained down into my face and shirt. By the end of the day, my shoulders were shot, my mind was blank, and my forearms were hamburger, but I’d drilled half a dozen rows of holes.

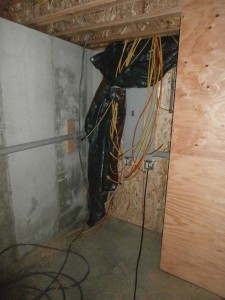
The electric panel

Next day, I ran wires from the panel to the far reaches of the house. I’d only bought 2 rolls of wire, and it didn’t take long to run out. Since Bernie’s crew was working off of extension cords running from the far corner of the basement, I made sure to put in a pair of working duplex plugs upstairs where they could get to them. I put a 5-gallon bucket over it to keep it dry, and called it a day.


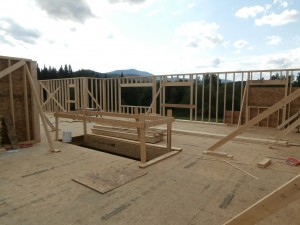
Framed exterior walls, seen from mudroom.

We’ve had fabulous weather for building, but in Vermont, we tend to get some rain during the night, and thunderstorms happen. In years past, you’d put down subflooring and then frame like crazy until you have a roof on, because after just a couple wet/dry cycles, the plywood would delaminate, and you’d have to deal with blisters or live with a weakened, squeaky floor. Nowadays, they use an OSB-like subfloor with a rubberized adhesive which is waaay more water-tolerant than plywood. When you watch this stuff cycling through 1/2″ of water one day and baking in the sun the next, you appreciate it.

As Mary will tell you, cleaning up is not my forte, but electrical work is messy. All those auger chips from hundreds of holes, and pieces of discarded Romex sheathing.  When we were building Westford, I got chewed out by the builder because I drilled all my holes and left the chips on the floor. Bernie runs a pretty clean job site, so every day, I suck it up and clean up my mess. I can’t help but think that it’s a waste of time, though.


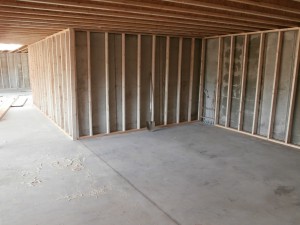
Basement framing over concrete walls

Once I finished routing the panel hots, there was not a lot I could do upstairs until the framing was farther along, so I started placing boxes in the basement. With concrete walls, I was going to put plugs in the ceiling like in Westford, but I realized that this was stupid. Sooner or later, I was going to frame out the walls down there, and it might as well be sooner. I had a big pile of 16′ 2x4s left over from last year’s retirement party stacked in the barn, so I hauled them over and used them up. Another 100 or so new 8-footers and a couple days later, I had the whole basement periphery framed from slab to joists. Finally, I can get back to wiring, and do it right.

Or so I thought. The framing was coming right along, but still wasn’t done. It’s one thing to tack blue boxes onto the studs and drill holes, but it’s a whole ‘nother thing to be pulling wires while they’re still putting up walls. So rather than breathe down the crew’s necks, I worked in the basement, placing boxes, pulling wires, pigtailing and, all too often, changing my mind (which gives you a healthy respect for the difference between CAD and the real world). I have a lot of large-gauge wire left over from Westford and I couldn’t quite visualize how to arrange my tools, so I decided to just run these leftovers as far as they’d reach and that would be where the plugs (and tools) would go.

Finally, all the walls were up, and I was upstairs pulling wires. A beautiful day, and it was very relaxing – a throwback to my childhood. Day 2 was less so, and by now, it’s hard work, but I show up when I want and do whatever I want — can’t beat that. I had no idea how much wire to buy, so I started with 2 rolls. Then another 5. Then another 3. And I’m out yet again. I bought a bag of 500 wire nuts and will run out soon.  After twisting them bare-handed for a whole day, my thumb was killing me, so I started using pliers. I bought 100 2×4 blue boxes. Then another 50. Then another 20, and I’m out again. Things have changed: I learned to pigtail using metal Raco’s, crimp connectors and tape instead of blue plastic boxes and wire nuts. And, like 2x lumber, they don’t make wire like they used to: today’s #12 wire is thinner than anything in my 20-year old collection of fragments, so I broke down and bought a new stripper. Until the roof trusses show up, I can’t wire anything in the ceiling, but I’m doing really well on everything else. Bernie thinks that 1 box per wall is plenty for a bedroom, but I think that’s crazy.  He thinks the same about me.

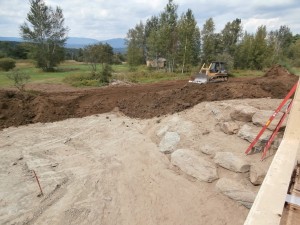
Spreading topsoil on the North side

Somewhere along the line, the “final” grading was done. The mountains of dirt from the cellar hole were spread around, big rocks placed near the foundation to define slopes,  the topsoil was re-distributed, and the driveway was completed. We have a beautiful yard.



Just as I’ve been going nuts without a shop, Mary has been chomping at the bit to plant a garden. Once the topsoil went back on, there was no stopping her, and I put a chain on the tractor, a pallet on the chain, and a rock on the pallet (and Mary on the tractor), and she rodeo’d around smoothing out the surface and raking out rocks. Today we seeded part of the lawn.



Posted in New House | Comments Off on Labor Day Gut Check

Meet the Barn

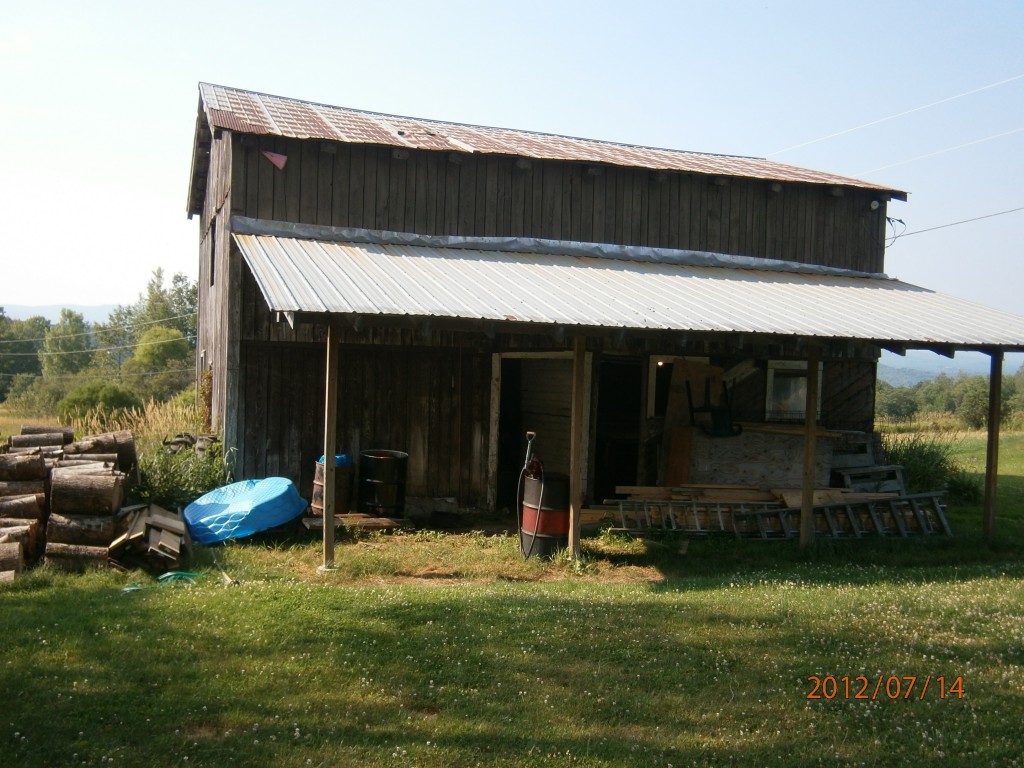
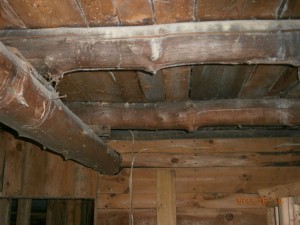
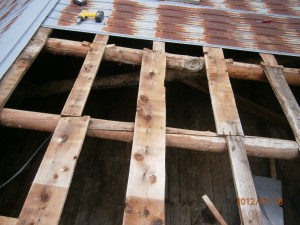
In particle physics, the cross sectional area of a uranium nucleus , about 10-28m2, is called  a ‘Barn’ because, in that context, it’s huge:  ‘As big as a barn.’ (And, according to the Zurich Naming Scheme for Nuclear Cross Sections, a millionth of a Barn is called an Outhouse. )Our barn is not huge: it’s about 25 x 30, and it’s an icky, breezy, tumble-down affair, full of spider webs and  sagging, rotted wood. It’s got potential, but it needs work.

The barn has been there forever and, at some point, a previous owner decided to try his hand at raising chickens. He built a 30′ x 90′ “wing” to hold the birds and an office, and quickly went out of business. The climate went to work on it, and by the time Mary bought the property, the ‘chicken wing’ was a mess. Several years ago, we took it down, saving much of the weathered wood.

The first time I met Mary’s kids, they were cooing over a cardboard box full of ducklings. They were cute until they grew up. And so were the ducks, which went on to live in the barn for 2 years. In the summer, they cooled off in a filthy puddle, and in the winter, they huddled together for warmth, waiting for Mary to carry their food thru the snow drifts every day. Their eggs tasted the moral equivalent of gluten free bread. We should of just ate the ducks.

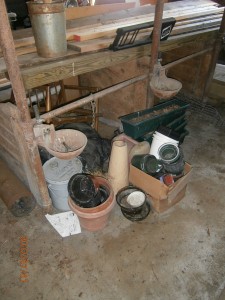
The barn is filthy, the roof leaks, one corner post is rotted through, and most of the sill plates are rotted out. There’s a turnbuckle upstairs which Joe installed when it looked like roof collapse was imminent.

But it has its charms, too. The concrete floor may be tilted, but it’s not heaved. It’s cool in the summer, it’s got a wide-open 2nd floor, and the beams are made of round logs with stubs where the branches were. Two rooms are stacked full of stickered, reclaimed wood from the chicken wing. And when we moved to Morrisville, anything that didn’t fit into the Green house, Stu, Chuck, or at the Mill, we stored in the Barn.

For the first time in my adult life, I am without a workshop while the new house goes up. Making a mess in the living room, where most of my tools are parked, wasn’t going to work, and Mary’s machines at the Mill are a 20 minute drive away. It’s only temporary, but it doesn’t take long to lose your mind, so I started setting up shop in the barn.

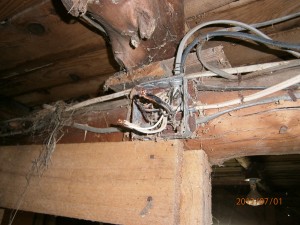
The first thing I needed was electricity. There were already a lot of plugs and lights and wires (a few were even grounded), but the cabling defied logic, everything was corroded and the boxes were full of years of crud from birds, insects, and rats.  So I took most of it out, re-used what I could, and re-built it.  By the time I used up most of my cache of old electrical parts and pieces left over from the other half of the barn, the whole affair ended up costing me 4 days of effort and less than $10.  I buried an extension cord in a spaded slit in the lawn, reversed the ‘hot’ in a shed plug, and then “plugged in the barn.” At the barn end of all that cabling, a circular saw doesn’t have a lot of voltage to work with, but it runs and, as God once said, “Let there be light.”

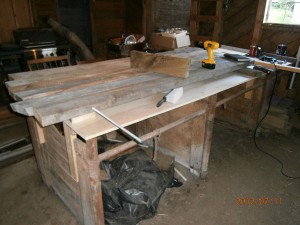
There were a couple of stalls in the front room for large animals, with sturdy metal posts set in concrete, so I shortened them, screwed on some stray 2×4’s, topped it with some old 3/4″ plywood, levelled it, and suddenly I’ve got a very large, very sturdy bench. Total cost: zero.


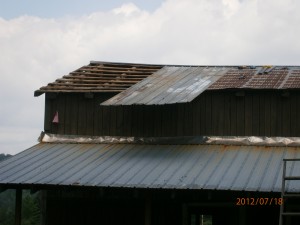
It’s been a dry summer, but whenever it rains, the wood and tools stored in the  southwest corner got wet. One part of the chicken wing that was in good shape when we took it down was the metal roofing, which we stacked near the burn pile. I picked a nice day, removed the leaky sections of the roof, and replaced them with pieces from our pile of spares. Total cost: $4, for a box of nails I decided not to use.


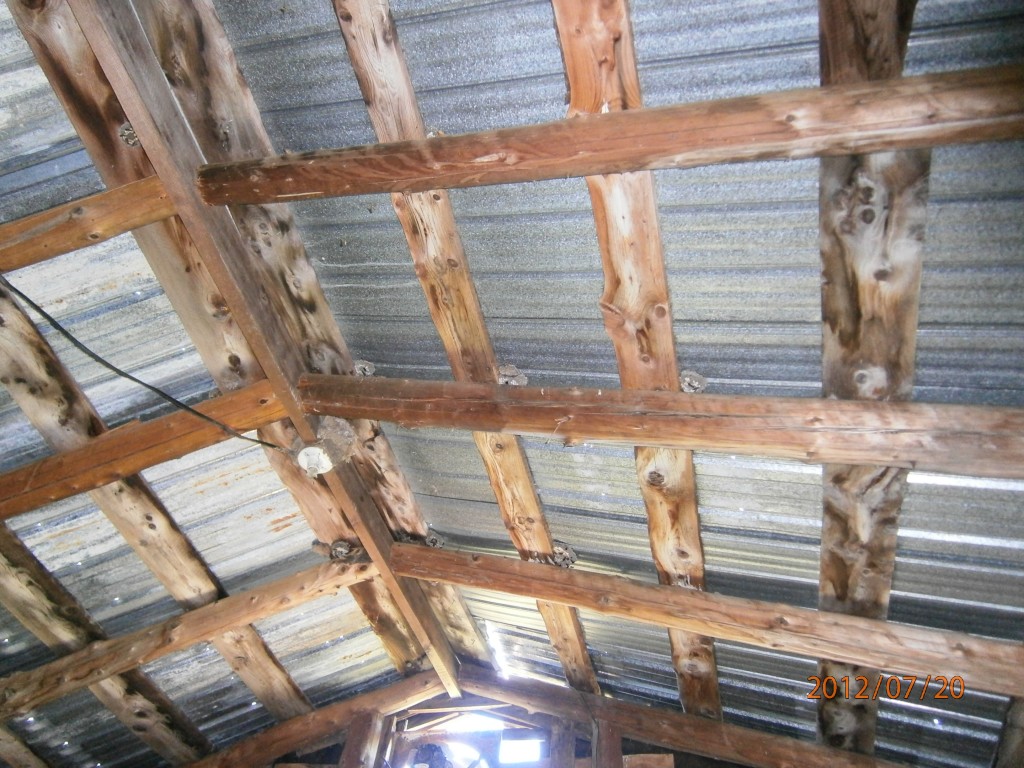
Here’s a game for ages 5 and up: How many hornets nests can you count in this picture of the barn’s roof? I only got stung once.

I have a cheap laser level, which I mounted on the four corners of the barn, just to see how far out-of-kilter it stands. On the sides on a contour in the field, it’s not too bad: +/- an inch. On the other 2 sides, it’s off by about 6″. I like to think that they built it perpendicular to the land, but it’s more likely that it’s settled. One of the first things I’ll have to do, when I have time, will be to replace the sills and level it.

I don’t know when this will happen, but I’d like to fix it up a little and put it to use. Watch this space.

Posted in Barn | Comments Off on Meet the Barn

Framing. Part I

My apologies to all my readers for recent radio silence. I tried to do something fancy with my site and screwed it up in the process. It took 10 days to get it running again, and the fix was to move to a linux server. What do I always tell you about Windows? Plus, I was picking blackberries in the woods and I fell off a log (which is easy to do), landed on my butt on top of my camera, and cracked it, so I’ve missed many photo ops.

But I’m back. Haleluja!  Now where were we ??

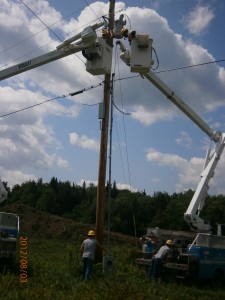
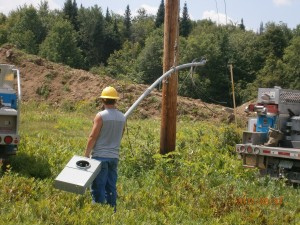
 We waited 2 weeks for electricity and on fri 8/3, the electric company brought 2 trucks and put up the transformer.  To me, it was all new and interesting, but they said they had 5 more jobs just like it lined up for that afternoon. They are very much set up to do exactly what they do, with exactly the right tools to do it, right down to pneumatic drills and the cherry pickers themselves, which are electrically isolated from the truck. They jockeyed their booms with 2 guys aloft, 2 guys on the ground, and a spare guy for no apparent reason.  The guy on the pole works in thick rubber gloves, but seemed almost careless around the wire, and when he brushed up against it, I did a double-take. It makes sense now, but I didn’t realize that the lower of the 2 lines on the pole is just a common, which is grounded at every pole. After doing all the prep work, the very last task was to connect the transformer’s primary to the top wire, and everyone was suddenly very diligent about standing back.  There were no sparks, and nobody died. When they left, there was a box on the pole, but not a meter.


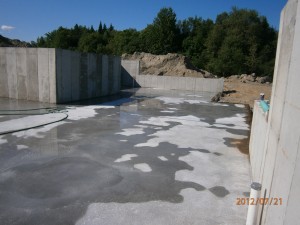
Mary wanted to seal the slab with Tung oil before work got started in earnest, so the first nice day after the slabs were cured, she grabbed an old bucket of oil, thinned it down, and we spread it thin with squeegees.


The electrician showed up on tuesday to put a panel in the basement and wire it out to the pole. He brought in a small backhoe to re-align the buried pipes with the housing mounted on the pole. Two days later, another VEC truck showed up, inspected the setup, and installed the meter. We have power !! 200 amp, single phase.

Two of Bernie’s crew, Shawn and Darren, had shown up on tuesday to put in the sill plates, working off of a generator. On wednesday, they framed most of the basement.  They were happy to finally have power.


Meanwhile, the floor system had begun to arrive. I could just say ‘a pile of joists,’ but this is one of those things that’s changed since the last time I built a house. You don’t just buy 2x’s any more: you put in a floor system. Since I really don’t know how I’m eventually going to configure the basement, we’re trying to minimize number of structural supports. I’d be OK with an extra support or 2, but Bernie wants to span the whole place with no posts or beams at all because, as he says, wherever we put them now, they’ll be in the wrong place later on. I was pretty sure it couldn’t be done, and the solution they came up with involved an 18″ deep microlam right down the middle. This would give a clearance of about 6′-2″, and I’d be bumping my head on it for the rest of my life, so I told him to use steel. I was still getting the feel of my new smartPhone, but I got the whole beam deflection calculation done in the barn the next day, downloading the equations and coefficients, and guestimating the loads. We picked the next-bigger beam size to be safe, and had it fabricated in town. This way, the beam is no lower than a doorway, and my head is safe. We ended up using 16″ deep engineered lumber joists, spanning 28′ near the physical plant, with the steel beam going E-W to support the rest of the floor.  While all the joists are 16″ deep, not all joists are created equal. The 28-footers are wooden I-beams in which the ‘flange’ is effectively a long 1 1/2 x 3 1/2 piece of plywood with about 20 plys.  The shorter spans are built with ‘flanges’ which are solid 2x’s, finger-joined at random lengths. In a couple of spots near the stairs, they used ‘microlams,’ which are long 16″ x 1.5″ 14-ply plywood, and they are doubled, side-by-side, for strength. We are talking brick shit house here.

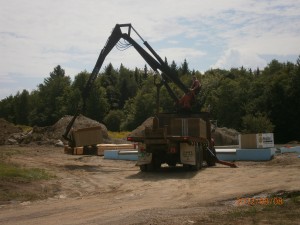
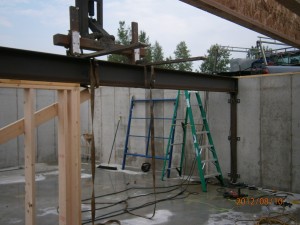
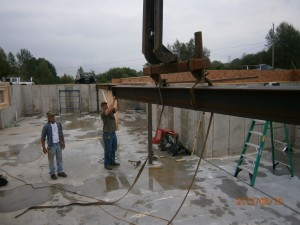
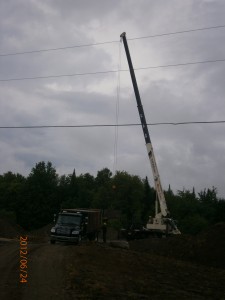
So they got most of the heftiest joists in place on thursday, plus a little subflooring, and the steel arrived on friday. When I think about moving a steel beam, I envision bulging veins and loud grunts.  Not Bernie. When the steel came, it came with a telescoping crane from Morrisville lumber to lift it into place. The right tool for the job. The fabricator had built some posts and welded flanges onto the ends of the beam segments so it went together easily, bolted it to the concrete and, after aligning the assembly, he welded the whole thing in place. Rock solid.


By tuesday the 14th, the whole pile of joists had been installed, but it turned out that the master BR joists had not been part of the pile, so the floor system ground to a halt.


At this point, I broke my camera.


They started to frame out the exterior walls near the mud+bed rooms, which had already been floored, and we had our first look at what a 9′ ceiling will look like. I like it.

On thursday the 16th, the rest of the joists were delivered, and they put them in, only to find that the master bedroom foundation is about 1″ out-of-square.  I had been taking as-built measurements for the roof truss design, and the north and south measurements never quite added up to the same numbers, so at least I wasn’t crazy. This is no big deal.

On friday, 8/17, they finished the subflooring, and for the first time, we could walk all over the footprint. On the North, where the basement is at-grade, the floor is almost 10′ above the ground, and the view is superb. We jumped up and down in the middle of the spans and there was no detectable spring in the floor. Very solid.

Monday the 21st, they continued framing the exterior walls, going counter-clockwise, and got as far as the master bedroom. On tuesday, they finished the perimeter. All this time, I’d been eyeballing the work, and found 2 glaring but minor problems with the window placements, which were easy to fix. That evening, though, I was wandering around, inspecting the progress after finishing up my work in the basement, and I happened to measure one of the rough openings, which turned out to be about an inch too small. I measured more, and they were all wrong. On the drawings, along with the RO widths, I’d listed the descriptions of the windows, as listed on the Pella order. For e.g, the mud room window was called “mud room 35×41,” which is the Pella model number. The rough opening for this window, though, is 36×42, and I think Shawn and Darren built all the RO’s based on the model numbers. This is a big fuckup, and I suppose I’m part of it, for putting too much information in the drawings. It took about a whole day to fix it.  “Little’ problems like this keep the project interesting.  It’s really going well.

Posted in New House | Comments Off on Framing. Part I

Week 7: Slabs

Honestly, I’m not totally sure that this is week 7, because some of these tasks have been spilling over on one another, but it’s pretty close. All this time, we’ve been thinking that Bernie is going to get to work on the framing as soon as the slabs are poured. Turns out that there’s going to be a lull in activity, because he doesn’t want to get started until the electricity is in and he shows up with the paperwork for requesting electrical service. So there’s going to be some quiet time while that runs its course.

I think Bernie’s built too many houses to think that everything would be done on schedule, so he built some fat into it and arranged to keep himself busy for a week “taking down a barn.” Plus, there are some ‘minor details’ which, like the roof line, are only coming together at the last minute, and he needs time to get vendors and plans in line.

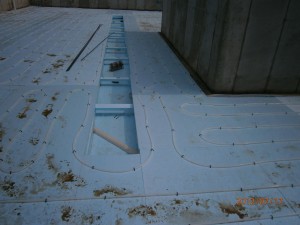
The floor system is one of them. Since I really don’t really have a plan for future walls in the basement, Bernie’s been twisting the joist vendor’s arm, trying to come up with a system which will span the big expanses with no walls, posts, or beams under the joists, giving me maximum flexibility down the road. I have my doubts about whether it can be done, but Bernie wants them to say it can’t before he starts putting posts and beams in the basement.  The plan they came up with was to span the bedroom wing with deep joists, and to use an 18″ deep wooden beam under joists in the master bedroom. This is not going to fly, as it would put the bottom of the beam at 6’6″, which is just too darn low. I told him to re-size it with a steel beam and get back to me. That weekend, I was working in the barn and, using my smart phone and a pencil, worked out the deflection numbers to show that a 12″ 35#/lf beam would deflect about 3/16″. Even if I’m a little off, it’s a good sanity check against anything Bernie’s people are going to come up with. In the end, we decided to go with a 12″ 40#/lf beam, which has an 8″ flange.

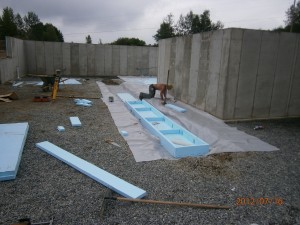
With that decision finally made, we knew we’d need a thick strip of concrete under the beam, so we got it formed and were finally clear to put down the rigid foam and install the radiant tubing. After a day to think about anything we’d missed, it was time to pour.


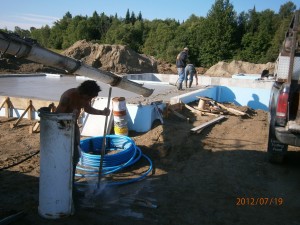
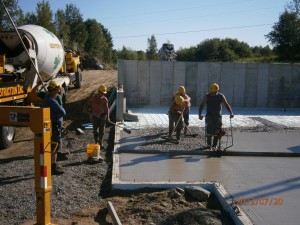
Thursday 7/19, the garage slab went in. As usual, they showed up first thing in the morning, backup horns blaring, and got it done. Looks great.


Friday, they poured the basement slab. For this one, they brought in a pumper and several more trucks of concrete. But it all went smoothly, and they put a nice finish on it. On saturday, we hijacked the sprinkler from Mary’s garden and kept the slab wet.


So now we wait for electricity. I’m pretty sure this is the first time I’ve ever been part of a concrete project and not put in a handprint.

Posted in Uncategorized | Comments Off on Week 7: Slabs

Week 6: Septic

Now that they know how deep the hole thru the foundation for wastewater is, they started building the septic system. We knew this when a steady stream of dump trucks began arriving at dawn.  I think he said 14 loads of mound sand got trucked to the site.
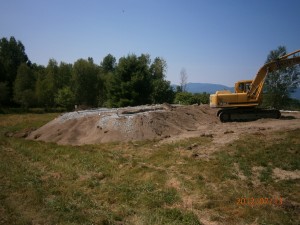
They ‘plowed’ the site of the mound trenches by poking the turf with the excavator tines, breaking it up into breadloaf-sized chunks, but leaving it in place. All those loads of sand went on top, in a long, straight pile.

They dug a hole for the septic tank and pump housing about 8′ x 20′ and a mile deep, about a foot to the right of the buried daylight drains. The daylight trench had an immovable rock in it, forcing the pipes to the far right of the trench, so this  hole was just missing the pipes. If it was me, I would have hit the pipes and made a mess of it, but: These guys are good.

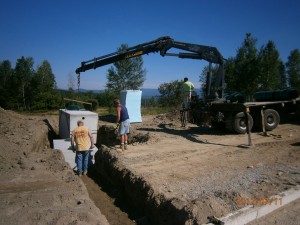
The next morning, our alarm clock was the sound of a truck backing up. At least that’s what Mary tells me: I heard nothing. I rushed thru my cats and coffee routine and headed next door to watch the show. The septic tank and pump station had arrived, and the truck had a crane built into it. If you think about it, this is a no-brainer: if you show up without a way to unload, then you’d better hope there’s an excavator and chains at the site. I just love hydraulic toys, and I watched, open-mouthed, as the arm unfurled itself, lifted the tanks, and set them down gently in the hole, exactly where they belonged. The ‘forearm’ even had a triple-concentric cylinder to extend its reach by several feet.  Very cool!

I left them alone to work, and in a couple of hours, the tanks were plumbed to the house and mound, backfilled, and covered up, with a couple of access ports sticking up above grade. In Westford, the septic tank was just a couple feet from the house, so to pump it, you had to remove a few bricks in the patio and then re-assemble it. The new  tank is 21′ out, so there is plenty of room for a patio, and we’ll probably plant a garden above the tanks.

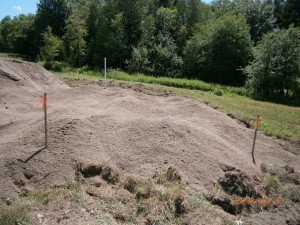
They went back to working on the mound, and dug 2 shallow trenches on the top of the sand pile, filled them with gravel, and assembled the distribution pipes. The engineer showed up to inspect, and they finished it off with more gravel, more sand, and a layer of topsoil. Problem is that both faces of the long pile were sloped at 3:1, and the result was butt ugly. I asked about it, and the guy said it had to be 3:1 because that’s what the drawing said. Mary’s not going to like this. So I emailed Pion and generally made a pest of myself. In the end, Bernie and Pion both said that the slope can be eased during the final grading.


Posted in Uncategorized | Comments Off on Week 6: Septic

The Angry Rock

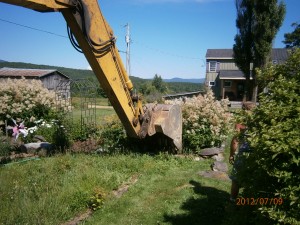
The day they dug the trench to the well, of course, it went right though the garden. They had to expose the well casing, so a few plants were displaced.

The next morning, when I asked Mary if there was anything that needed doing today, she asked that I re-plant the white bush that had been taken out. She’s a trouper, but I could tell that she was a little upset about losing this plant. She bought this plant in a 6″ pot about 8 years ago and it thrived. It got so big it had to be divided, so we took half to Westford (where it thrived and needs to be divided). It got big again, so she divided it again and planted some near the well head, where it got big yet again and was about ready to be divided when the excavator drove up. 

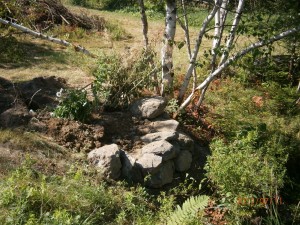
So I didn’t really think losing this bush was a big deal. But if I gotta waste my time on this, then I might as well make it interesting, so I decided to take the rocks which had been near the well head and build a brand new rock garden down by the pond.  So I got the tractor and started shuttling back and forth with the plants, rocks, and tools. I felt a little stupid doing it, because 200′ away, the crew was moving great gobs of soil and stone for the septic system, and there I was, put-put-puttering around with a shovel and an oversized garden tractor.  I’ll show them!

While loading the very first load of rocks, I got careless and clipped two fingers between 2 big rocks. Nobody has moved more rocks than I have, and I know better than to let this happen. I wish I could say my pride hurt more than my fingers, but my fingers hurt like Hell. I left my gloves on and kept working, but very carefully. If I’m bleeding, I’ll find out soon enough.

I dug a hollow out of the hillside and started lining it with rocks. The same rock that had smashed my fingertip a little earlier got away from me and slid almost down to the water.  I knew I’d never get it back up the hill by hand, so I backed the backhoe right up to the precipice, set the brake, and tried to grapple the rock back up the hill.  I almost had it when the brakes slipped a little and the tractor started to tip. I came THAT close to dumping the tractor in the pond before moving to a safer spot and trying again. I finally got it.

Eventually, I found just the right spot for this rock, but needed to flip it over. It wasn’t hard, but I was off-balance, and it pinned my leg to another rock and scraped a 9″ swath across my shin before coming to rest on my foot. The movie 127 Hours came to mind.

The rock doesn’t seem to like it, but I like the rock right where it is. I put another course of stones above it, backfilled with soil, and planted the white bush next to it. I hope it thrives.


As it turns out, only one finger got smashed, and it looks like I voted in an Iraqi election and dipped it in ink. It’s my fuck-you finger, and when it’s better, I’m going to point it at that Angry Rock.

Posted in New House | 1 Comment

Week 5: Trenches

There is just no end to site work. Some days, I go out there and I’m not really sure which dirt has been moved or which trenches filled. The piles of gravel which they’ve been spreading on the footing drains have started showing up spread in the main basement, flat and compacted and about even with the tops of the footings. Part of the trench to daylight has been filled, making the far side accessible by vehicle, without going around the back.


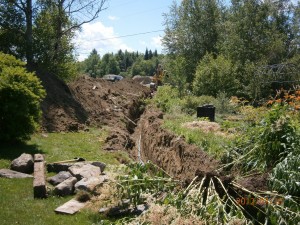
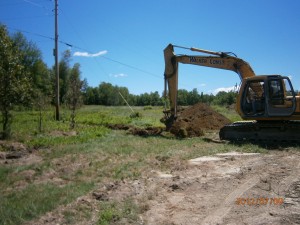
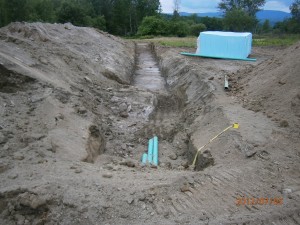
But when they started digging the trench to the utility pole, I knew something new was going on. They put in not one, not 2, but 3 2″ pipes from house to pole. As Bernie later explained it to me, sometimes a spare comes in handy, and I bet the extra only cost me about $200.  A few days later, Bernie showed up with paperwork from the Electric Coop which we had to sign and have notarized. This seemed like overkill until I realized that we were signing over an easement to the trench.  Gotta do it.

The next day, they came after the well head. I had to show them where it was hidden in the flower bed, but once they knew where to look, they went to work exposing the casing and dug a trench from the well to the house, put in pipe and 10-3 cable, and backfilled it. Since the well is being shared by both houses, there was some extra work needed to be done right at the well head, so the last 10′ was not backfilled. The next day, Manosh came by to hook up the pipe and remove the check valve in the Green house basement. Even this was not enough, though, because when the engineer came by for inspection a few days later, he pointed out that the State requires that the pump in the well must have a capacity rated for 5 gpm per residence, so the pump is going to have to be replaced. This won’t happen till next week, so we have an enormous pile of dirt on the lawn and an enormous hole in the garden.

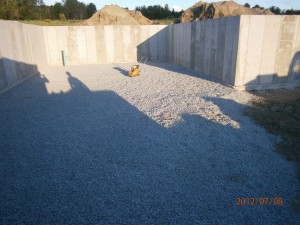
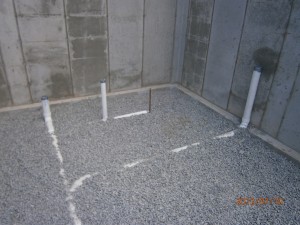
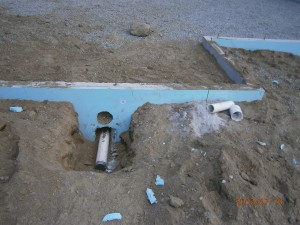
Somewhere along the line, they finished filling the whole basement floor with 8″ of compacted gravel and put in the slab drain between the furnace room and the daylight trench. The plumber showed up to install the under-slab wastewater drainage, and because the longest of these lines had to cross the slab drain, the whole system had to be put in about 4″ deeper than they might have, so there was a little extra digging and had to drill a hole thru the foundation a foot deeper than the one that had been molded in when they poured. Bottom line, though, is that they got it all done in 1 day.

I vividly remember doing this work in Westford. It was a stormy day of heavy rain, and I did it all with cast iron pipe, including drainage for a basement bathroom I never got around to putting in. This time around, the plumber used PVC, and the assumed sizes for the shower and walls are very generous. If and when I get around to putting in a bathroom down there, there will be plenty of room for a nice one.

Posted in New House | Comments Off on Week 5: Trenches

Week 4: Backfill

By now, I’m going a little nuts watching all the activity next door without having much of a role to play. Every day, I show up a couple of times and say hello to the crew and snap some photos. No telling what goes through their minds, but they are always … courteous, if only because I’m paying the bill. I mess with the pond. I mess with the barn. But I make it a point not to get too involved, because I know that sooner or later, the shit is going to hit the fan.

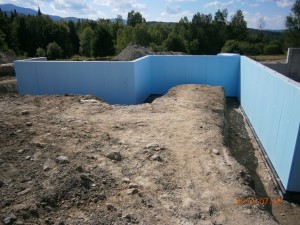
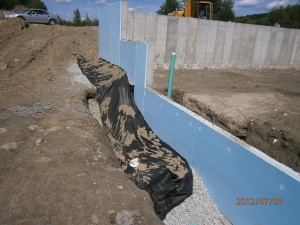
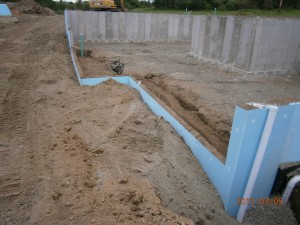
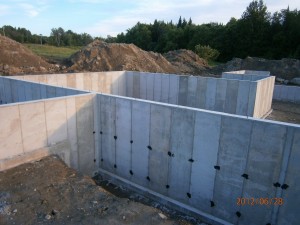
With the foundation poured and sealed, the next step is affixing rigid foam insulation on the outside, And several pallets of it have been delivered to the job site.  Nothing much to it, and it took a day to get it done, using half a dozen nails per sheet.


They filled the garage with sand and tamped it down good with something that was closer to a thick pogo stick than a vibrator. It took 2 solid days of running this compactor to fill the garage.

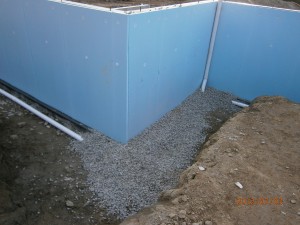
They laid perforated drainage pipes around the perimeter by the footings, covered them with gravel, and landscape fabric before backfilling about half-way up the wall with mound sand. Walker has a lot of jobs going on, so only 1 truck is assigned to bring sand and gravel to the site but it’s enough. The move one bucket at a time from the pile to the foundation, using the excavator, and excavators are not built for speed, so it is slow going, especially near the far side of the house. They don’t want to pack it down for fear that a still-green foundation wall will be knocked over. When the floor system goes on, they will add more dirt near the walls.


Digging the trench to daylight, they finally ran into a rock they couldn’t move. Not a big deal. I can’t quite believe that no blasting was required for the whole job.


Half the week and all weekend, there was a lot of food and family, as Ella had flown out for Adam’s wedding at Sugarbush. But that’s another story.

Posted in Uncategorized | Comments Off on Week 4: Backfill

Week 3: Foundation

Monday, June 25, they had the footings stripped of the forms before I got up.

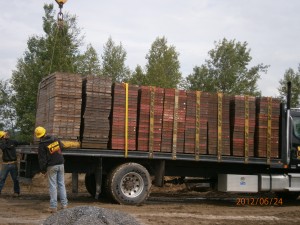
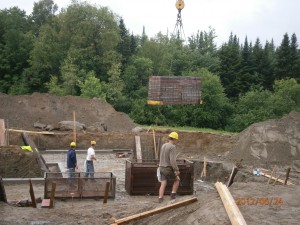
A truck full of forms and a crane showed up and unloaded. It shouldn’t surprise me that these guys have it down to a science: they get it done, fast and right, or they wouldn’t be in business. The kid in me just loves the big hydraulic toys they bring in to move stuff around. Walker has half a dozen jobs going, and when the forms were unloaded, the crane disappeared to another job site.


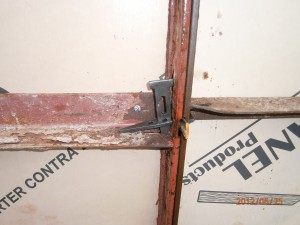
On the first day, they got the outer half of the entire form in place. The metal forms get nailed to a chalk line snapped on the newly-poured footing and they have a cool wedge-based connector system which holds the pieces of form together. Metal spacers hang off the wedges, ready to engage the opposing form wall.


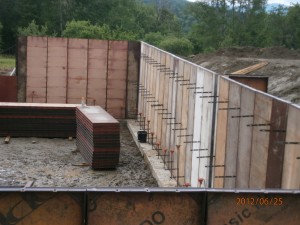
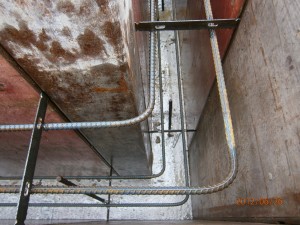
On tuesday, they worked on the inner half of the forms. Two pairs of horizontal re-bar all around, plus periodic vertical pieces. Then the inner pieces go on, engaging the spacers, and the whole affair is trued up with turnbuckles anchored to 2×4’s staked to the ground.  We left for Maggie’s mid-day, and it didn’t look to me like they were going to finish.


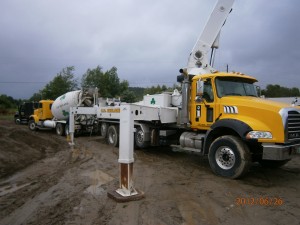
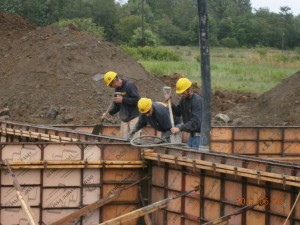
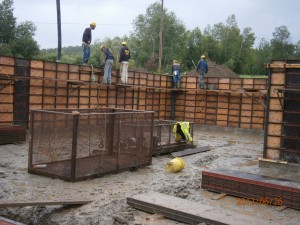
They did. Wednesday morning, the site was buzzing, with a pump and a stream of concrete trucks. By the time I got out there at 8:45, they were 4 trucks into the pour, and by 10:00, they were done. I hate to repeat myself, but these guys know what they’re doing. One guy working the pump, 2 guys guiding the pour, 1 guy vibrating the walls, a trowel guy, someone putting in anchor pins, and when it was all poured, they all worked the turnbuckles, truing up the whole structure to chalk lines. And then they all disappeared.


Compare this to the last time I poured a form of my own design in Westford. It was for the fireplace extension, and I’d dug down to the footing and then built a form, with plywood and 2x’s and screws. When I poured it, 8′ of head blew out the form, and the bottom of the hole became one giant footing. I ‘saved’ it by backfilling the hole with dirt, working fast, and a lot of clamps. Thankfully, I’d ordered more mix than I needed, and everything above the ground looks straight and true. A very sturdy fireplace.

When I first showed Bernie what the foundation would look like, I was a little embarrassed that it was so complicated: Footings on 3 levels and 14 corners. But when I asked the crew about it, they thought it was an easy job: all right angles, multiples of 4′ tall, and no wall higher than 8′. Makes sense.

Thursday, they stripped the forms, loaded them on the truck, and were gone.


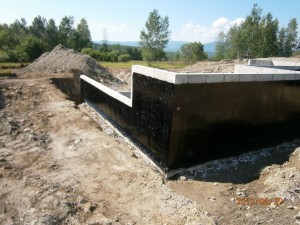
Friday, they applied a rubberized coating for waterproofing. In Westford, this came out of 5 gallon buckets and went on with a roller, and never leaked. Here, it went on with a sprayer, 1/8″ thick, or more, where it oozed downward under its own weight.  These walls aren’t going to leak.

Posted in New House | Comments Off on Week 3: Foundation

Week 2: Footings

While the driveway progressed, we made a batch of strawberry jam and I spent some time clearing out the pond, which is overgrown from years of neglect. It sits near the north edge of the property and, if you don’t interrupt, the bullfrogs converse. Below it, you can find the remnants of a fence, and I followed its line into the woods until I located the survey marker at the corner of the property.  I thinned the trees with a chainsaw, cleared low brush with a blade fitted to my trimmer, took out eye-level branches with a snipper, and hauled all the debris into a big pile. A year ago, I was clearing brush from the site of the rock wall in Westford and hauling it into piles. I like it when history repeats itself. The pond needs work, but whoever built it did a really nice job of it. I am itching to get started, but with the house gaining steam, it is the wrong project to take on right now. 

The driveway was close to the house site by now, and we had one last chance to site it. We’d staked it out too close to the mound, so we moved it up the hill 40′ and turned it 15 degrees to the left, for the view. They set up the laser level and we decided how high the foundation walls would be, and then the dozer moved in.

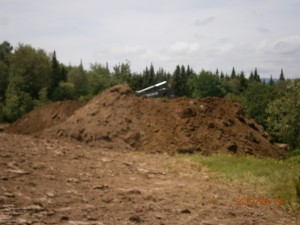
First step was to stockpile the topsoil. In Westford, there was about 3 inches, with rocks everywhere. Here, there is over a foot of topsoil, and no rocks to speak of. By the time it was stripped, there were 3 impressive piles set aside. Here’s one.


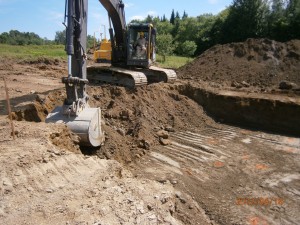
The excavator moved in and started digging the basement hole. He dug for 2 days. This was precision work, and nary a clod of dirt was out of place. One guy ran the machine and one guy ran the level, raked out the surface to dead flat and spray painted it when it was perfect. There was no ledge except for 1 huge rock in the path of the drain to daylight. The soil barely began to be wet at the deepest spot. All the dirt was groomed by thursday.

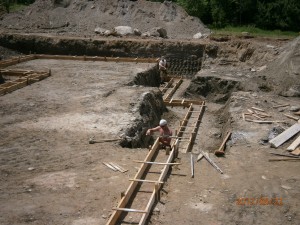
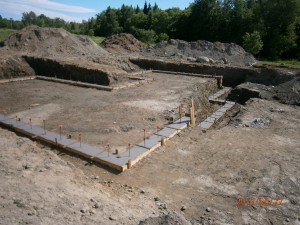
Friday morning, they built the forms for the footings: 2x’s staked onto the dead-flat level ground and trued up. It didn’t take long: These guys are good.


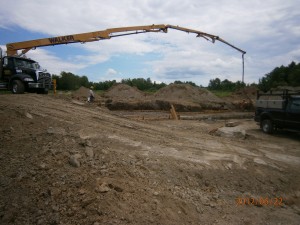
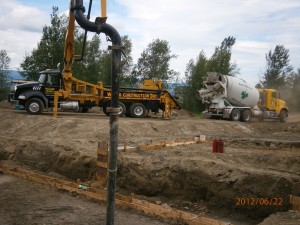
Mid-day, the pumper showed up. I’d never seen one in action before, and they are amazing. They aren’t particularly huge, but by the time it unfolded, it had a reach of about 80′, enough to park by the patio and pump to the farthest corner of the house.


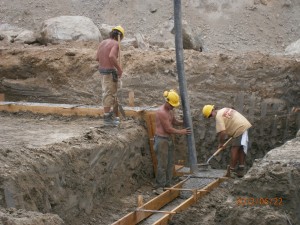
With all the prep work done, a train of cement trucks showed up, backed up to the pump, and they filled off the forms. One guy controlled the pump. Two guys guided the flow. Two guys followed behind, troweling, and another putting in re-bar. It didn’t take but 2 hours, and the minute it was done, the whole crew disappeared, leaving only the pump guy to clean out his rig. Very impressive and professional.


Posted in New House | Comments Off on Week 2: Footings