There was a time, about 6 months ago, when we lived in a dream world where we hoped to be living in the new place shortly after labor day. For that to work, we’d have needed to start mid-May, nothing could have gone wrong, no rain days, no days off, no changes in plans, and a whole slew of contractors would have to have been chomping at the bit. It would have put God’s “7 days” schtick to shame.
Instead, we moved to Mville by 5/31, waited a mandatory 15 days for public comment, and got started on 6/13. Site work took about 6+ weeks, and there was a 2 week ‘pause’ before framing started. That puts us about a month behind a best-case schedule in which an Oct 1 move might have been possible.
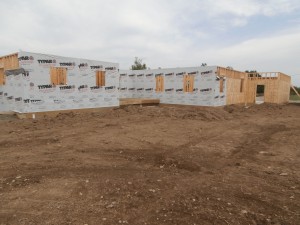
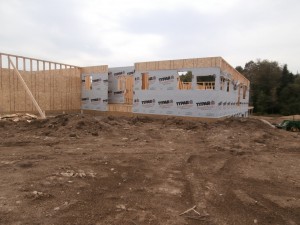
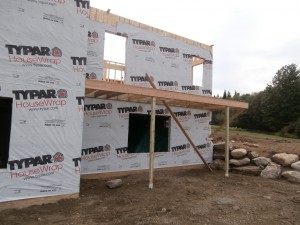
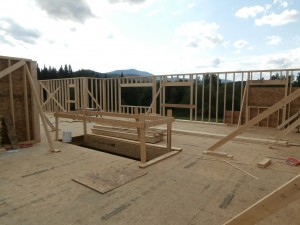
It’s Labor Day. Most of August was spent on framing, from basement walls to steel beam to floor system to subfloor to exterior walls to interior walls to a stairway and garage walls. Since the roof trusses are not ready yet, the Crew is splitting their time with another job, and all the invisible details that make framing ‘done’ are getting done. This is what the project looks like now:
For the longest time, there was not much I could do to help, so I kept busy by prepping for woodwork to come, while staying out of Bernie’s hair. He came by one day and mentioned that he was going to be needing a spec for the electrician pretty soon, so I got to work on planning for that. He’d said to expect something like $80/box, and when my grand total box count came to 307 boxes, I knew my days of sitting on the sidelines were over. Sure, Bernie had warned that taking on the electrical system would be intimidating and sure, the Nebraska Valley house he’d showed us looked pretty impressive, but come on: I’m a EE with 2o years of experience designing the most complicated memories on Earth. I’ve been pulling wires since 3rd grade, and I’ve wired many structures. I can do this.
And besides, a CAD model of box placements is no substitute for putting boxes exactly where you want them. So I headed to Yankee Electric and bought a bunch of blue boxes and a few rolls of wire and got started. Problem #1: I can’t wire walls that haven’t been framed yet, so I started off by drilling holes in the joists for “busses” of wires from the panel to wherever the circuit was located. In the past, I’ve always run wires by drilling lots of little holes, and crammed as many wires as possible through them. This is awkward and ugly, and this time around, I went the other extreme and loaded my big drill with a 2″ auger bit and planned some Manhattan routes. Most of the time, this is overkill, but on some runs, there are enough wires that I’m happy to have a huge hole.
That first day was brutal. It’s a heavy drill and, with a big bit in it, it bucks. The work was all overhead, and the holes were horizontal, so gravity was not helpful when the self-feed petered out on the last 1/16″ of every hole. The only way to apply pressure to finish the hole was to brace my forearms against the next joist over and lever the drill into the hole. And the whole time, big auger chips rained down into my face and shirt. By the end of the day, my shoulders were shot, my mind was blank, and my forearms were hamburger, but I’d drilled half a dozen rows of holes.
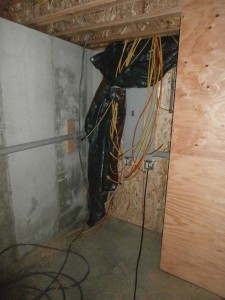
Next day, I ran wires from the panel to the far reaches of the house. I’d only bought 2 rolls of wire, and it didn’t take long to run out. Since Bernie’s crew was working off of extension cords running from the far corner of the basement, I made sure to put in a pair of working duplex plugs upstairs where they could get to them. I put a 5-gallon bucket over it to keep it dry, and called it a day.
We’ve had fabulous weather for building, but in Vermont, we tend to get some rain during the night, and thunderstorms happen. In years past, you’d put down subflooring and then frame like crazy until you have a roof on, because after just a couple wet/dry cycles, the plywood would delaminate, and you’d have to deal with blisters or live with a weakened, squeaky floor. Nowadays, they use an OSB-like subfloor with a rubberized adhesive which is waaay more water-tolerant than plywood. When you watch this stuff cycling through 1/2″ of water one day and baking in the sun the next, you appreciate it.
As Mary will tell you, cleaning up is not my forte, but electrical work is messy. All those auger chips from hundreds of holes, and pieces of discarded Romex sheathing. When we were building Westford, I got chewed out by the builder because I drilled all my holes and left the chips on the floor. Bernie runs a pretty clean job site, so every day, I suck it up and clean up my mess. I can’t help but think that it’s a waste of time, though.
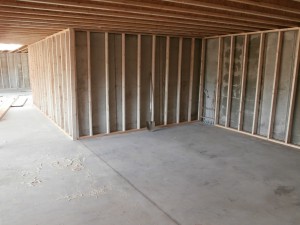
Once I finished routing the panel hots, there was not a lot I could do upstairs until the framing was farther along, so I started placing boxes in the basement. With concrete walls, I was going to put plugs in the ceiling like in Westford, but I realized that this was stupid. Sooner or later, I was going to frame out the walls down there, and it might as well be sooner. I had a big pile of 16′ 2x4s left over from last year’s retirement party stacked in the barn, so I hauled them over and used them up. Another 100 or so new 8-footers and a couple days later, I had the whole basement periphery framed from slab to joists. Finally, I can get back to wiring, and do it right.
Or so I thought. The framing was coming right along, but still wasn’t done. It’s one thing to tack blue boxes onto the studs and drill holes, but it’s a whole ‘nother thing to be pulling wires while they’re still putting up walls. So rather than breathe down the crew’s necks, I worked in the basement, placing boxes, pulling wires, pigtailing and, all too often, changing my mind (which gives you a healthy respect for the difference between CAD and the real world). I have a lot of large-gauge wire left over from Westford and I couldn’t quite visualize how to arrange my tools, so I decided to just run these leftovers as far as they’d reach and that would be where the plugs (and tools) would go.
Finally, all the walls were up, and I was upstairs pulling wires. A beautiful day, and it was very relaxing – a throwback to my childhood. Day 2 was less so, and by now, it’s hard work, but I show up when I want and do whatever I want — can’t beat that. I had no idea how much wire to buy, so I started with 2 rolls. Then another 5. Then another 3. And I’m out yet again. I bought a bag of 500 wire nuts and will run out soon. After twisting them bare-handed for a whole day, my thumb was killing me, so I started using pliers. I bought 100 2×4 blue boxes. Then another 50. Then another 20, and I’m out again. Things have changed: I learned to pigtail using metal Raco’s, crimp connectors and tape instead of blue plastic boxes and wire nuts. And, like 2x lumber, they don’t make wire like they used to: today’s #12 wire is thinner than anything in my 20-year old collection of fragments, so I broke down and bought a new stripper. Until the roof trusses show up, I can’t wire anything in the ceiling, but I’m doing really well on everything else. Bernie thinks that 1 box per wall is plenty for a bedroom, but I think that’s crazy. He thinks the same about me.
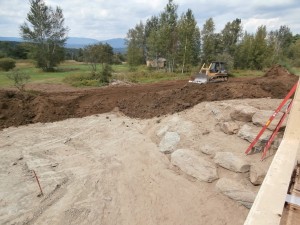
Somewhere along the line, the “final” grading was done. The mountains of dirt from the cellar hole were spread around, big rocks placed near the foundation to define slopes, the topsoil was re-distributed, and the driveway was completed. We have a beautiful yard.
 Just as I’ve been going nuts without a shop, Mary has been chomping at the bit to plant a garden. Once the topsoil went back on, there was no stopping her, and I put a chain on the tractor, a pallet on the chain, and a rock on the pallet (and Mary on the tractor), and she rodeo’d around smoothing out the surface and raking out rocks. Today we seeded part of the lawn.

